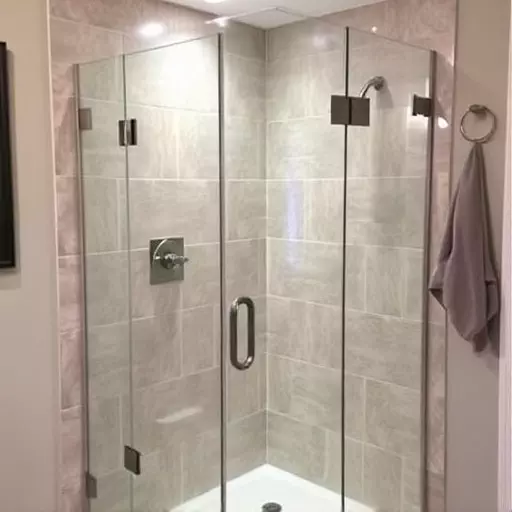
In Toledo, swinging glass shower door installations are popular for modern and accessible bathrooms. Key steps include preparing the wall, installing hinges with strong adhesives, attaching the door, and sealing with silicone caulk. Essential tools include a level, drill, screwdriver, measuring tape, and more. For waterproofing, apply 1/4-inch wide bead of silicone caulk around hinges after cleaning and preparing the area. This guide offers detailed instructions and tool recommendations for successful installation. Regular cleaning with mild soap and water or vinegar solutions maintains the door's aesthetics and functionality. Proper tools and following installation steps ensure a professional result, preventing leaks and water damage for years.
“Enhance your Toledo bathroom with a seamless swinging glass shower door installation. This comprehensive guide delves into the process, offering a step-by-step approach to ensure a durable and water-tight seal around hinges. From gathering essential tools like silicone caulk and a putty knife to preparing the surface and avoiding common mistakes, we cover it all. Learn the art of waterproofing, ensuring your shower door installation in Toledo stands the test of time, providing both functionality and aesthetic appeal.”
- Understanding Swinging Glass Shower Door Installation in Toledo
- Essential Tools Required for the Job
- Preparation Steps Before Installation
- Applying Waterproofing around Hinges: The Step-by-Step Guide
- Common Mistakes to Avoid During Installation
- Ensuring Longevity and Maintenance of Your Shower Door
- Conclusion (Implied: Benefits of a Well-Installed Swinging Glass Shower Door)
Understanding Swinging Glass Shower Door Installation in Toledo
In Toledo, the swinging glass shower door installation is a common practice for creating a sleek and functional bathroom space. This type of installation involves attaching the shower door to the wall using hinges, allowing it to swing open and closed, providing easy access to the shower area. Understanding this process is key to ensuring a successful do-it-yourself project or when hiring a professional installer.
The swinging glass shower door installation steps begin with preparing the surface, which typically involves cleaning and smoothing the walls where the door will be mounted. Next, the hinges are secured, often using powerful adhesives and hardware like screws and anchors. Once the hinges are in place, the door is attached, and the final touches include sealing around the door frame to prevent water seepage. The tools required for this installation include a level, drill, screwdriver, measuring tape, and silicone caulk, ensuring a secure and watertight seal.
Essential Tools Required for the Job
When tackling a swinging glass shower door installation in Toledo or anywhere else, having the right tools is paramount to achieving a secure and watertight seal. The essential tools for this job include a measuring tape, level, utility knife, silicone caulk, caulk gun, and a putty knife.
The measuring tape and level are crucial for accurately determining door dimensions and ensuring proper alignment during installation. A utility knife is helpful for cutting excess caulk or sealing materials. The caulk gun dispenses silicone caulk, which creates the waterproof barrier around the hinges. Putty knives facilitate smooth application of caulk and cleaning up any excess.
Preparation Steps Before Installation

Before tackling a swinging glass shower door installation in Toledo, ensuring proper preparation is key to achieving a watertight seal around the hinges. Begin by gathering all necessary tools, including a silicone caulk gun, weatherstripping, a putty knife, and a lint-free cloth. Remove any existing caulk or weatherstripping from the door frame and surrounding areas using a utility knife, taking care not to damage the surface. Clean the area thoroughly with water and soap, eliminating any residue or debris that could hinder adhesion.
Next, measure the width of the gap between the door frame and the wall, as well as the height of the hinge area. Cut the weatherstripping to fit these measurements, ensuring it covers both the top and sides of the door. Apply a bead of silicone caulk along the edges of the weatherstripping, pressing it firmly into place. Smooth out any excess caulk with the putty knife, creating a seamless finish. This meticulous preparation will create an effective barrier against water seepage, ensuring your swinging glass shower door installation in Toledo is both functional and long-lasting.
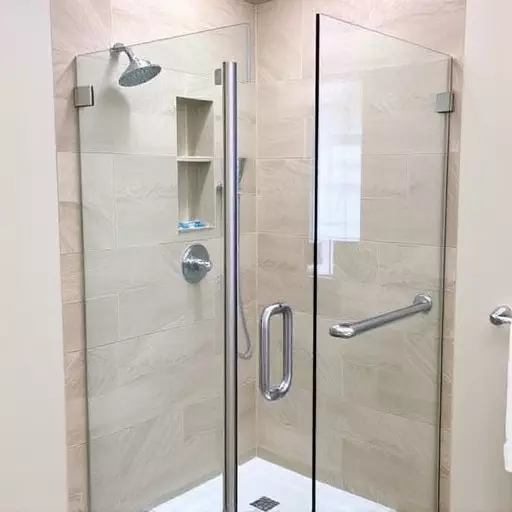
Applying Waterproofing around Hinges: The Step-by-Step Guide

Applying waterproofing around hinges is a crucial step in ensuring your swinging glass shower door installation in Toledo remains leak-free and durable. Here’s a step-by-step guide to help you through the process:
1. Gather Your Tools: Before beginning, gather all the necessary tools for swinging glass shower door installation. This typically includes silicone caulk, a caulk gun, a putty knife, sandpaper (fine grit), and cleaning solutions like mineral spirits or alcohol.
2. Prepare the Area: Clean the area around the hinges thoroughly to remove any dust, grease, or debris. Ensure the surface is dry before proceeding. Lightly sand the hinge area if necessary to create a slightly rough texture that will help the caulk adhere better. Wipe down again after sanding to eliminate any dust particles.
3. Apply Silicone Caulk: Load your caulk gun with silicone caulk and start applying it around the hinges, following the direction of the door’s swing. Create a bead of caulk about 1/4-inch wide along each hinge. Smooth out any excess using the putty knife to create a neat finish.
4. Seal Gaps: Once the caulk has cured slightly (usually takes around 20 minutes), inspect your work for any gaps. If necessary, reapply caulk and smooth it out again. Ensure all gaps between the door, hinges, and frame are sealed tightly to prevent water seepage.
Common Mistakes to Avoid During Installation

Ensuring Longevity and Maintenance of Your Shower Door

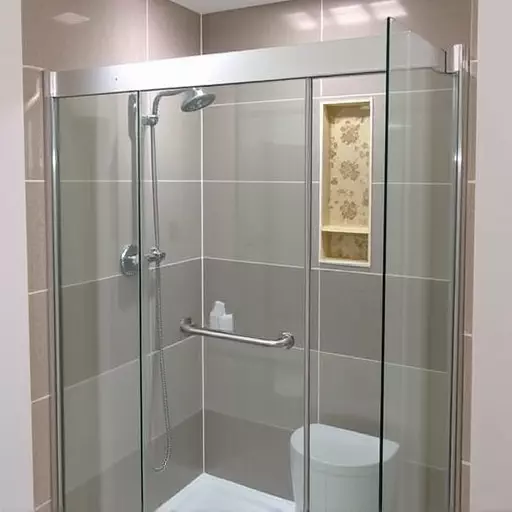
To ensure your swinging glass shower door in Toledo lasts for years to come, proper maintenance is key. Regular cleaning with mild soap and water will keep it looking pristine. Avoid using abrasive cleaners or scrub brushes that could damage the surface. For tough stains or residue, a mixture of white vinegar and water can be effective without leaving streaks or residue.
When it comes to swinging glass shower door installation steps, understanding what tools are required is essential. Basic tools like a level, tape measure, pencil, and a drill with appropriate bits are usually sufficient for the job. Some additional tools, such as adjustable wrenches and a putty knife, may be helpful depending on your specific model and installation complexity.
Conclusion (Implied: Benefits of a Well-Installed Swinging Glass Shower Door)

A well-installed swinging glass shower door offers numerous advantages that enhance your bathroom experience. Firstly, it provides a sleek and modern aesthetic, transforming your shower into a stylish retreat. The smooth operation and secure fit ensure water remains contained within the shower area, preventing leaks and water damage to your floor. This not only saves you from costly repairs but also contributes to maintaining the overall integrity of your bathroom.
Additionally, these doors are easy to clean and maintain. The swinging design allows for convenient access, making it simple to wipe away soap scum and water stains. Moreover, they provide privacy while still allowing light to filter through, creating a spa-like atmosphere. With the right tools and following simple installation steps (as outlined in this guide), you can achieve a professional-looking swinging glass shower door in your Toledo home, ensuring both functionality and aesthetics for years to come.