
In-dash video systems have become popular among Toledo car owners looking to enhance their driving experience with entertainment and navigation. These integrated systems offer dashboard mounting, advanced features like GPS and smartphone integration, and high-definition displays. Installation options range from DIY projects to professional services, catering to diverse budgets. Understanding these systems is crucial for informed decision-making while ensuring safety and budget constraints are met. DIY installation saves costs and allows customization but requires research, tools, and preparation. Professional installation offers expert craftsmanship and tailored advice but at a higher price. Budget-friendly options from brands like Pioneer and Kenwood are available for DIY enthusiasts, with services from Crutchfield and Best Buy providing quality screens and expert support. Avoiding common pitfalls like incorrect wiring and electrical issues is essential for reliable performance and seamless integration with the vehicle's systems.
Looking to enhance your vehicle’s entertainment system without breaking the bank? Discover the world of in-dash video installations, a cost-effective way to transform your driving experience. This comprehensive guide covers everything from understanding the basics and DIY benefits to choosing the right hardware and avoiding common mistakes. Learn about budget-friendly brands and weigh the pros and cons of professional installation versus doing it yourself. Elevate your drive with an in-dash video system tailored to your needs and wallet.
- Understanding In-Dash Video Systems: A Brief Overview
- Benefits of DIY Installation: Save Money, Gain Control
- Choosing the Right Hardware for Your Vehicle
- Step-by-Step Guide to a Successful DIY In-Dash Video Setup
- Professional Installation vs. DIY: Weighing the Pros and Cons
- Top Budget-Friendly Brands and Products for In-Dash Videos
- Common Mistakes to Avoid During In-Dash Video Installation
Understanding In-Dash Video Systems: A Brief Overview
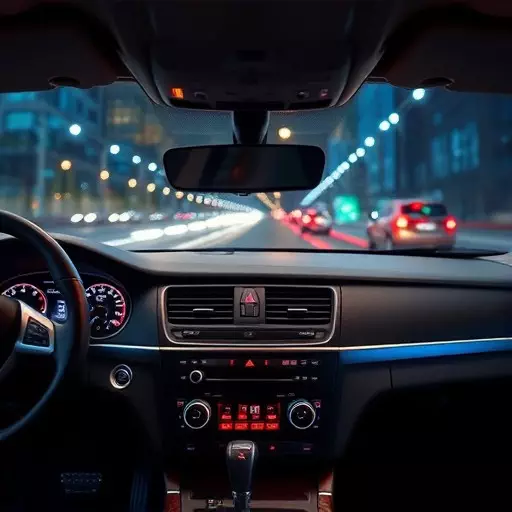
In-dash video systems have become increasingly popular among car owners looking to enhance their driving experience with entertainment and navigation. These integrated systems offer a seamless way to mount screens directly into the vehicle’s dashboard, providing an immersive visual experience without the need for clunky mounts or visors. With modern technology, in-dash videos go beyond basic entertainment; they include advanced features like GPS navigation, smartphone integration, and high-definition displays that rival home theater setups. This evolution has sparked interest among both DIY enthusiasts and those preferring professional installation, with options available to suit every budget.
For those considering an in-dash video installation in Toledo, whether it’s a DIY project or a professional service, the choices are diverse. A do-it-yourself approach can be cost-effective, allowing car owners to select specific components and install them themselves. Alternatively, many turn to specialized shops for a tailored, professional in-dash video installation that guarantees optimal performance and a clean, factory-like finish. Whatever the method chosen, understanding these systems is key to making an informed decision, ensuring a safe and enjoyable driving experience while keeping within budget constraints.
Benefits of DIY Installation: Save Money, Gain Control
DIY installation of an in-dash video system offers a range of benefits for those looking to enhance their vehicle’s entertainment and safety features without breaking the bank. One of the most significant advantages is the substantial cost savings compared to professional installation services, making it an attractive option for budget-conscious car owners. By taking on this project yourself, you avoid the often steep fees charged by professionals, allowing you to allocate your funds more efficiently.
Additionally, doing it yourself gives you a level of control over the entire process. You can customize the installation to suit your specific needs and preferences, ensuring that the system integrates seamlessly with your vehicle’s interior. This hands-on approach also enables you to learn new skills and gain a deeper understanding of automotive technology, empowering you to tackle future DIY projects with confidence.
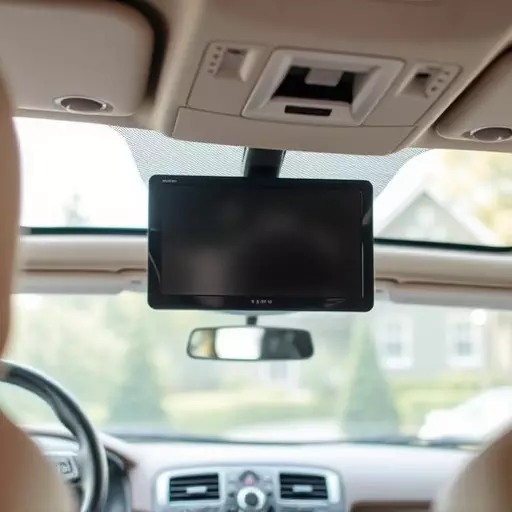
Choosing the Right Hardware for Your Vehicle
When considering an in-dash video setup for your vehicle, selecting the appropriate hardware is a key step. The market offers various options tailored to different car makes and models, ensuring compatibility from start to finish. For DIY enthusiasts, choosing the right components allows for a straightforward installation process that can enhance your driving experience without breaking the bank.
In Toledo or any other city, you have several choices, from budget-friendly kits with essential features to more advanced systems offering advanced capabilities. A professional in-dash video installation service might be ideal if you desire a seamless, high-quality fit without the hassle of DIY challenges. Compatibility with your vehicle’s architecture and ensuring proper integration is crucial for a successful installation, so choosing hardware that aligns with your car’s specifications is paramount.
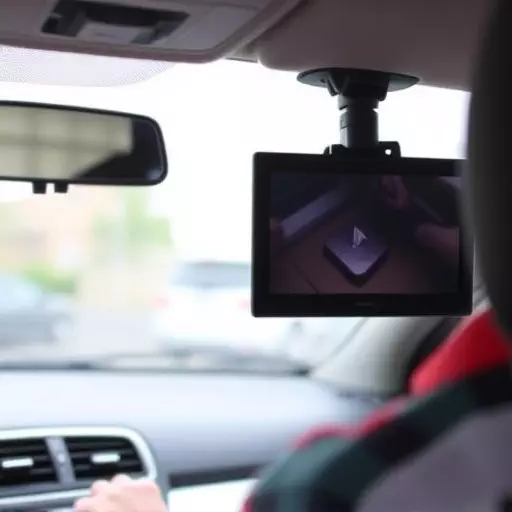
Step-by-Step Guide to a Successful DIY In-Dash Video Setup

Setting up an in-dash video system yourself can seem daunting, but with a well-planned strategy, it’s entirely doable and budget-friendly. Here’s a step-by-step guide to help you navigate the process successfully:
1. Assess Your Needs: Begin by determining your specific requirements. Consider factors like screen size, resolution, and features (e.g., navigation, Bluetooth connectivity). Research different models available in the market that align with your budget. For a DIY approach, opt for user-friendly options designed for easy installation.
2. Gather Tools and Components: Based on your research, create a list of necessary tools and parts. Common essentials include a suitable in-dash video player, a monitor (matching your chosen size), mounting hardware, and cables. Ensure compatibility between the components by checking product specifications. You might also need basic tools like screwdrivers, wire strippers, and heat shrink tubing for a secure connection.
3. Prepare Your Vehicle: Clean the dash area thoroughly to ensure a clean finish. Remove any existing audio/video equipment if needed. Mark the mounting locations accurately to avoid damage to your vehicle’s interior. If you’re unsure about any steps, consider consulting online tutorials specific to your car model for visual guidance.
4. Install the Video Player: Start by securing the video player in place using the provided brackets or mounting solutions. Ensure it aligns with your dashboard’s design for a seamless look. Connect all necessary cables, including power, audio, and data. Test the player’s functionality to ensure smooth operation.
5. Mount the Monitor: Carefully position the monitor, ensuring it’s securely fastened. Adjust its angle for optimal viewing. Connect the monitor to the video player using the appropriate cable. Conceal any excess wires neatly for a clean finish.
6. Final Touches and Testing: Double-check all connections and secure any loose parts. Power on your system to verify that everything functions correctly, including audio and video outputs. Calibrate settings as per your preference, focusing on clarity and viewing angle.
Professional Installation vs. DIY: Weighing the Pros and Cons

When considering an in-dash video system for your vehicle, one key decision point is whether to go for professional installation or tackle the job yourself as a DIY project. Both options have their merits and drawbacks. Professional installation offers the advantage of expert craftsmanship, ensuring a flawless fit and optimal performance. Technicians with experience can also provide valuable insights into the best setup for your specific car model, enhancing overall viewing pleasure. However, this route comes at a cost, often significantly higher than DIY alternatives.
On the other hand, doing it yourself allows for cost savings, providing an affordable way to enhance your driving experience. Many modern in-dash video systems come with straightforward installation manuals and kits, making the process accessible to automotive enthusiasts. DIY installation empowers you to customize the setup according to your preferences without extra charges. Yet, there’s a learning curve involved, and mistakes could lead to issues like poor picture quality or system malfunctions. Proper research and preparation are crucial to ensure a successful DIY install, potentially saving you money while providing the desired video experience in your Toledo vehicle.
Top Budget-Friendly Brands and Products for In-Dash Videos

When it comes to budget-friendly in-dash video options, several brands stand out for offering quality products at affordable prices. For those considering a DIY in-dash video installation Toledo or looking to enlist professional services, these top picks are worth exploring. Brands like Pioneer and Kenwood offer a range of in-dash receivers with built-in video capabilities, perfect for transforming your car’s dashboard into an entertainment hub. These devices often include features like DVD players, Bluetooth connectivity, and USB ports, allowing you to play media and connect your devices seamlessly.
For those opting for a professional in-dash video installation, companies like Crutchfield and Best Buy offer comprehensive packages that include high-quality screens, wiring harnesses, and easy-to-follow instructions. These installations are ideal for those who want the peace of mind that comes with expert craftsmanship and warranty support. Moreover, many of these brands provide online resources and tutorials to assist DIY enthusiasts in navigating the installation process, ensuring a smooth and successful in-dash video installation Toledo regardless of your chosen path.
Common Mistakes to Avoid During In-Dash Video Installation

When tackling an in-dash video installation, Toledo residents often make some common mistakes that can lead to subpar results or even damage to their vehicles. One of the biggest blunders is attempting a DIY install without proper knowledge and tools. In-dash video systems can be intricate, and incorrect wiring or misalignment can cause malfunctions.
Another error is not considering the vehicle’s electrical system. An unsuitable power source or inadequate grounding might lead to flickering screens or sudden shutdowns. Always opt for professional installation services if you’re unsure, as experts will ensure a seamless fit and proper integration with your car’s existing systems, ensuring both optimal performance and long-lasting reliability.