Upgrading your truck's in-dash stereo involves understanding vehicle specifications and choosing from brands like Kenwood, Pioneer, or Sony. Key features include touchscreen displays, Bluetooth, and Apple/Android integration. Compatibility with your truck's make and model is crucial. You can DIY or hire professionals for installation, each offering cost savings (DIY) or peace of mind (professionals). Preparation, tool gathering, and research are essential for a successful install. For optimal sound quality, select high-quality parts, maintain connections, and invest in durable speakers. The decision between DIY and professional services depends on skill, time, budget, and desired features.
Upgrade your truck’s audio experience with an in-dash stereo installation! This comprehensive guide covers everything from selecting the right car audio system installation for trucks, like the Toledo model, to navigating a DIY truck audio installation. We break down the process step-by-step, provide tips for optimal sound quality, and address common challenges. Learn when to opt for professional truck audio installation based on your skill level and vehicle specifics. Take control of enhancing your truck’s entertainment system today!
- Understanding Your Truck's In-Dash Stereo Options
- Preparing for a DIY Truck Audio Installation
- The Tools and Equipment You'll Need
- Step-by-Step Guide to Installing an In-Dash Stereo System
- Tips for Achieving the Best Sound Quality
- Common Challenges and How to Overcome Them
- Professional vs. DIY: When to Seek Expert Help
Understanding Your Truck's In-Dash Stereo Options

When it comes to upgrading your truck’s in-dash stereo, understanding your options is half the battle won. Modern trucks offer a range of standard and optional in-dash stereos, each with unique features and capabilities. Some popular choices include models from brands like Kenwood, Pioneer, and Sony, which cater to various preferences and budgets. For those seeking advanced functionality, touchscreen displays, Bluetooth connectivity, and Apple CarPlay or Android Auto integration are essential considerations.
Whether you opt for a DIY truck audio installation or prefer a professional service, knowing your vehicle’s specifications is crucial. This includes checking compatibility with your truck’s make and model, ensuring the right fitment, and understanding the required tools for installation. With the right car audio system installation for trucks in Toledo, whether done yourself or by experts, you can transform your truck’s interior into a mobile entertainment hub tailored to your needs.
Preparing for a DIY Truck Audio Installation

Before diving into an in-dash stereo installation for your truck, it’s crucial to prepare and gather all necessary tools and components specifically designed for truck audio system installation, like a compatible head unit for your make and model, wiring kits tailored for your vehicle, and speakers suitable for the space. A DIY truck audio installation offers cost savings and customization, but requires meticulous planning. Researching your truck’s interior layout, identifying the best placement for your new stereo, and understanding your vehicle’s electrical system are essential steps to ensure a successful and safe installation.
If you opt for a professional truck audio installation, select a reputable shop with experienced technicians who specialize in car audio systems for trucks. They can provide expert advice, guarantee quality products, and perform the intricate wiring and integration required for optimal sound performance. This route might be pricier, but it offers peace of mind, ensuring your stereo is installed correctly, aligned with your vehicle’s safety standards, and backed by a warranty.
The Tools and Equipment You'll Need

Installing an in-dash stereo in your truck can be a great way to enhance your driving experience. To tackle this project, you’ll need a few essential tools and equipment designed for car audio system installation for trucks, especially if you’re considering a DIY approach. A reliable set of screwdrivers, including flathead and Phillips head options, is a must-have. These will be used for removing the existing dashboard components and securing the new stereo.
Additionally, a precision knife or cutting tool for trimming plastic, wire strippers for preparing cables, and crimping tools for connecting wires are valuable additions to your toolkit. For professional truck audio installation, having a measuring tape ensures accurate cuts, while a voltage tester helps ensure safe handling of electrical components. These tools will enable you to navigate the intricate process with ease, resulting in a high-quality sound system tailored to your truck’s interior.
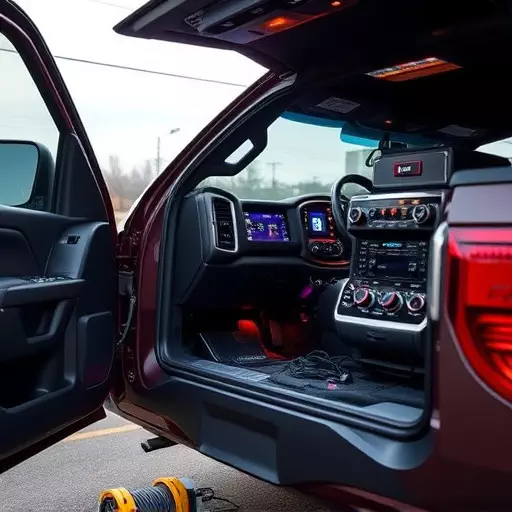
Step-by-Step Guide to Installing an In-Dash Stereo System

Installing an in-dash stereo system in your truck can enhance your driving experience and boost your vehicle’s entertainment capabilities. Here’s a step-by-step guide for both DIY enthusiasts and those considering professional help, focusing on the car audio system installation for trucks like the Toledo.
1. Preparation: Start by gathering all necessary tools and materials, including your new in-dash stereo, mounting kit, wiring harness, and any additional accessories. Ensure your truck’s interior is clean and free of debris. If you’re planning a DIY installation, research your vehicle’s make and model online for specific instructions and to understand the layout of your dashboard. For professional installations, choose a trusted shop with experienced technicians who specialize in truck audio systems.
2. Remove Existing Stereo: Locate and remove the old stereo from its mounting location. This often involves unscrewing or unclipping retention pieces and detaching power and antenna wires. Take note of how each wire is connected for easy reconnection later. Use a dash kit (if provided) to simplify the removal process, ensuring you don’t damage any dashboard components.
3. Prepare Mounting Location: Clean the area where the new stereo will be installed. Ensure it aligns correctly with your truck’s interior aesthetics and provides easy access to controls. Install the mounting kit according to the manufacturer’s instructions, securing the stereo firmly in place.
4. Wiring and Connections: Connect the wiring harness from the new stereo to your vehicle’s power and signal sources. This may include radio, antenna, and speaker wires. Double-check all connections for secure fits. For professional installations, technicians will use specialized tools to ensure precise and clean cuts, hiding wire routing for a sleek finish.
5. Test and Calibration: Once the stereo is mounted and wired, power it on and test its functionality. Adjust settings, ensure clear audio, and verify that all controls operate correctly. Some systems may require calibration for optimal sound performance.
Tips for Achieving the Best Sound Quality

When aiming for optimal sound quality with an in-dash stereo installation for trucks, several key considerations come into play. Start by choosing a high-quality car audio system designed specifically for trucks, like those offered by brands specializing in truck upgrades. The right equipment ensures compatibility and performance tailored to your vehicle’s unique requirements.
Next, focus on proper wiring and connectivity. Use genuine replacement wires and connectors to maintain signal integrity throughout the installation process. Ensure ample space around the components for airflow and cooling, as trucks’ interiors can get hot. Additionally, invest in high-performance speakers designed for truck environments, capable of handling higher decibel levels and vibrations without distortion. Regular maintenance, such as cleaning contacts and checking connections, will also contribute to consistent sound quality over time, making your DIY truck audio installation or professional service a resounding success.
Common Challenges and How to Overcome Them

When installing a new in-dash stereo in a truck, one often encounters unique challenges due to the vehicle’s specific design and features. The primary hurdle is ensuring compatibility with the existing electrical system and space constraints posed by the truck’s dashboard layout. Many popular trucks have complex interiors with various control modules and sensors, requiring careful planning to avoid damaging these components during installation.
To overcome these challenges, consider seeking expert advice or consulting a professional truck audio installer. They can provide tailored solutions, especially for DIY enthusiasts who want a seamless fit without compromising safety or functionality. Using high-quality components and following manufacturer guidelines ensures a successful installation process, resulting in an upgraded car audio system that enhances the driving experience for both folks on the road and those navigating bustling city streets.
Professional vs. DIY: When to Seek Expert Help

When considering an in-dash stereo installation for your truck, deciding between a DIY approach and seeking professional assistance depends on various factors. For those comfortable with technical projects and have the time to dedicate to the task, DIY installations can be a cost-effective solution. It allows for customization and the chance to learn new skills. Many online resources and tutorials can guide you through the process of installing a car audio system in your truck, from choosing the right components to wiring and integration.
However, professional installation offers its advantages. Experts have the expertise and experience to ensure a seamless fit and optimal performance for your specific vehicle. They use high-quality equipment and have access to specialized tools. Moreover, professionals can provide valuable insights into the latest audio technologies and offer recommendations tailored to your needs. If you’re not confident in your DIY abilities or want guaranteed results, enlisting professional help for your truck’s audio installation is a wise decision, especially when it comes to advanced features like navigation, Bluetooth connectivity, and sound optimization.