Toilet installation in new homes requires careful planning and the right Toilet Installation Tools Toledo for a successful DIY project or professional installation. Essential tools include a level, measuring tape, and various hand tools for tasks like leveling, connecting water lines, and securing hardware. Understanding the Toilet Installation Process, which involves removing old toilets, preparing the floor, installing the base, connecting water supply lines, and testing for leaks, is crucial. Meticulous planning, including assessing plumbing layout, gathering tools and materials, and checking toilet dimensions, ensures a smooth process. Following a step-by-step guide, prioritizing water-tightness with high-quality tools and proper positioning, and performing regular checks and maintenance extend the lifespan of your new toilet installation in Toledo's diverse housing landscape.
Toilet Installation for New Homes: A Comprehensive Guide
Upgrading your home’s plumbing system starts with efficient toilet installation. This guide is designed to equip both professionals and DIY enthusiasts with the knowledge needed for a successful toilet installation in Toledo homes. From understanding the necessary tools and requirements to mastering the step-by-step process, we’ll walk you through every aspect of DIY toilet installation. Learn how to overcome common challenges, ensure a watertight fit, and perform final checks and maintenance for your new toilet.
- Understanding Toilet Installation Tools and Requirements for Toledo Homes
- Planning Your DIY Toilet Installation: Preparation Steps
- The Step-by-Step Toilet Installation Process
- Common Challenges During Toilet Fitting and How to Overcome Them
- Essential Tips for Ensuring a Water-Tight and Functional Toilet Fit
- Final Checks and Maintenance Tips for Your New Toilet Installation
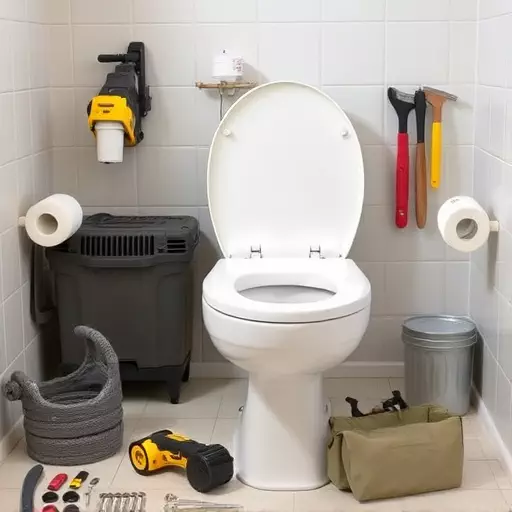
Understanding Toilet Installation Tools and Requirements for Toledo Homes
Toilet installation in new homes is a process that requires careful planning and the right tools for a successful DIY project or a seamless professional installation. In Toledo, homeowners or contractors must be equipped with essential Toilet Installation Tools to ensure a smooth and efficient process. Standard tools include a level, measuring tape, pencil, hammer, wrenches, pliers, and an adjustable screwdriver. These are fundamental for tasks such as measuring the toilet’s position, leveling it during placement, securing water lines, and tightening hardware.
Understanding the Toilet Installation Process is crucial to prepare for any challenges that may arise. It involves several steps: removing the old toilet if applicable, preparing the floor, installing the toilet base or bowl, connecting the water supply lines, and testing for leaks. For DIY enthusiasts, having a clear guide or tutorial can make the process less daunting. In Toledo, with its diverse housing landscape, knowing how to navigate these installation requirements can ensure a well-fitted, functional toilet that enhances the overall bathroom experience.
Planning Your DIY Toilet Installation: Preparation Steps
Before starting your DIY toilet installation, meticulous planning and preparation are key to a successful project. Begin by assessing your new home’s plumbing layout using blueprints or consulting with a plumber. Identify where the water supply lines and waste pipes are located, ensuring they align with the toilet’s specifications. This step is crucial for any Toilet Installation Tools Toledo to ensure compatibility and avoid future complications.
Next, gather all necessary tools and materials. A standard DIY toilet installation kit includes a new toilet, installation hardware, and sometimes even a bidet or additional accessories. Double-check that your chosen toilet fits within the designated space, considering height, width, and depth measurements. Proper preparation, including measuring, planning, and gathering the right tools, sets the foundation for a smooth Toilet Installation Process, allowing you to tackle this task with confidence.
The Step-by-Step Toilet Installation Process
Toilet Installation for New Homes: The Step-by-Step Process
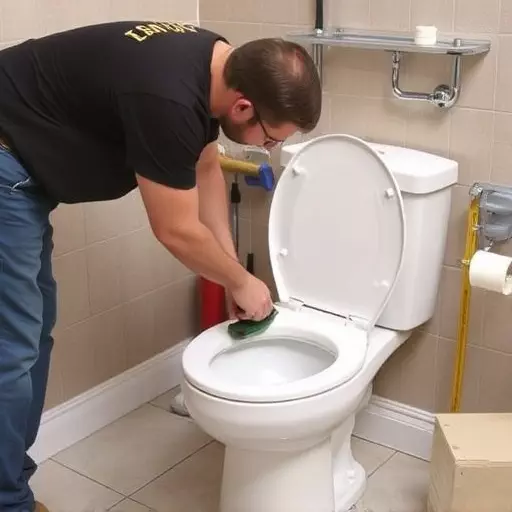
The first step in any toilet installation, whether you’re a professional or considering a DIY project, is preparing the floor. This involves ensuring the area is level and clearing away any debris or old fixtures. Use Toilet Installation Tools Toledo to check for any existing plumbing lines and mark their locations accurately. Next, lay down a water-resistant barrier to protect the subfloor from moisture.
Once the foundation is set, it’s time to install the toilet itself. This typically involves attaching the toilet bowl to the floor using bolts and securing the tank to the wall behind. Follow the manufacturer’s instructions for any specific adjustments or levelings needed. After ensuring everything is securely fastened, connect the water supply lines, checking for leaks at each connection point. Finally, test the flush mechanism to ensure it operates smoothly and efficiently before finishing with a touch of caulk around the base for added water resistance in DIY Toilet Installation projects.
Common Challenges During Toilet Fitting and How to Overcome Them

Toilet installation can present several challenges, especially in new homes where plumbing systems are still being finalized. One common issue is ensuring proper drainage and water supply connections. Before beginning the toilet installation process, double-check that all necessary pipes are accessible and in place. DIY enthusiasts may find this a hurdle, but it’s manageable by consulting building plans and planning accordingly.
Another challenge is fitting the toilet correctly to ensure it remains level and stable. Using the right toilet installation tools Toledo can make this process easier. Leveling devices and adjustable mounting hardware allow for precise adjustments during the DIY toilet installation. Overcoming these challenges requires careful preparation, the right tools, and a step-by-step adherence to the toilet installation process, ensuring a smooth and successful fitting.
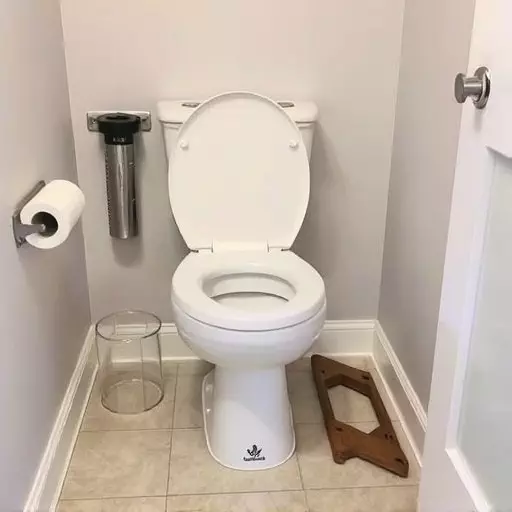
Essential Tips for Ensuring a Water-Tight and Functional Toilet Fit

When installing a new toilet, especially in DIY toilet installation projects, paying close attention to water-tightness is paramount. Start by ensuring all components are in pristine condition and properly aligned. Use high-quality Toilet Installation Tools Toledo for precise cutting, fitting, and sealing. The wax ring, which creates a seal between the toilet and the floor, should be meticulously positioned and secured with the right adhesive. Remember that even minor gaps can lead to leaks over time.
During the toilet installation process, carefully follow manufacturer guidelines for both the tank and bowl assembly. Ensure that all connections are secure and tight. Use plumbing putty or caulk for additional sealing around the base of the toilet to prevent water intrusion. Regularly test the toilet’s functionality after installation, checking for any signs of leaks at the base, tank-to-bowl joint, and wax ring. This proactive approach will guarantee a water-tight fit and minimize future maintenance headaches.
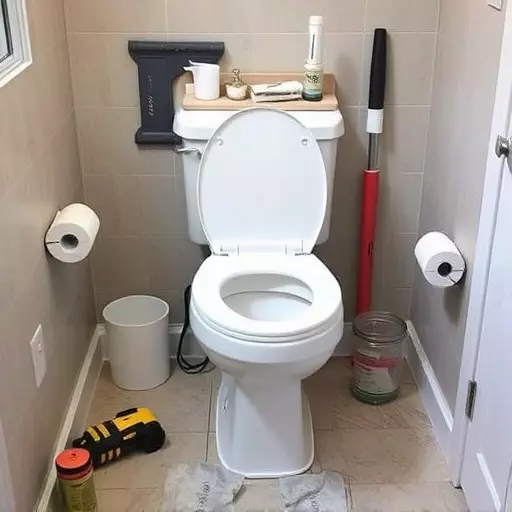
Final Checks and Maintenance Tips for Your New Toilet Installation

After successfully installing your new toilet, it’s crucial to perform final checks and maintain your toilet installation properly. Begin by verifying water connections; turn on the valves and check for any leaks around the fixtures. Ensure the flush mechanism operates smoothly, and the toilet fills and empties as expected. Use a leak-detection solution or food colouring in the tank to confirm no leaks are present.
Regular maintenance will ensure your new toilet installation lasts longer. Clean the toilet regularly with mild, non-abrasive cleaners. Avoid overloading the toilet with excessive paper products; use just enough to clear waste effectively. Periodically check for and replace any worn out parts, such as flappers or fill valves. DIY Toilet Installation tools like plungers, cleaning brushes, and replacement parts can be useful in addressing minor issues promptly.