
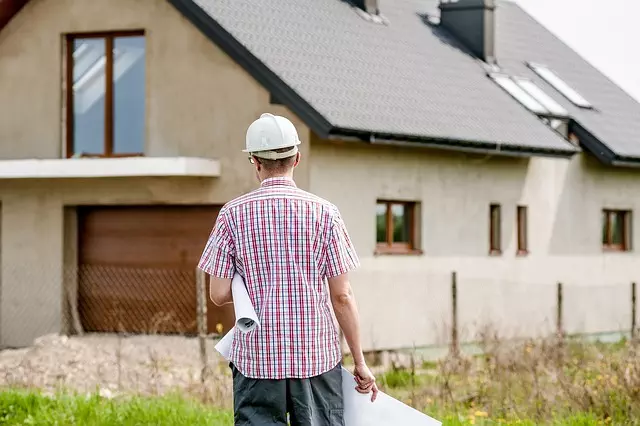
This TL;DR covers common household repairs that many DIY enthusiasts will face, including leaky faucets, dripping showerheads, electrical issues, clogged drains, and creaky floorboards or sticking doors. Early detection of these problems can prevent them from worsening. Simple fixes like replacing washers for faucets, cleaning nozzles for showerheads, and using a plumber's snake or chemical cleaners for drains are often sufficient. For more complex issues like a malfunctioning garage door opener, professional handyman skills may be necessary. Regular home repair and maintenance checks are advised to prevent larger, costlier problems. A well-stocked toolkit with essential manual tools, power tools, fasteners, adhesives, sealants, and safety gear is crucial for effective repairs. When encountering setbacks, a systematic approach that includes diagnosing the issue, ensuring safety measures, removing damaged components, performing repair work, inspecting the repair, and finishing with aesthetic touches is recommended to ensure both functionality and visual appeal. Proper documentation of repair processes can aid in future reference and enhance home safety and longevity, emphasizing the importance of Home Repair and Maintenance expertise.
Navigating the world of home repairs can be a DIY endeavor, yet unexpected challenges often arise. This article provides practical solutions from skilled handymen to address common DIY mishaps, ensuring your home maintenance woes are swiftly resolved. From recognizing and rectifying errors to equipping yourself with the right tools and materials, learn how to effectively manage post-DIY repair tasks for lasting home upkeep. Dive into ‘Handyman Solutions for DIY Failures’ to elevate your home repair and maintenance skills.
- Diagnosing Common DIY Home Repair Mishaps and Their Handyman Fixes
- Essential Tools and Materials Every Handyman Should Have for Quick Solutions to DIY Failures
- Step-by-Step Guide to Effective Home Maintenance Strategies Post-DIY Attempts
Diagnosing Common DIY Home Repair Mishaps and Their Handyman Fixes
When tackling home repair projects, even the most diligent DIY enthusiasts can encounter mishaps. Identifying common issues is the first step in addressing DIY home repair failures effectively. Leaky faucets, for instance, often result from worn-out washers or O-rings that need replacement—a straightforward task for a skilled handyman. Similarly, a dripping showerhead may simply require cleaning out its nozzles. Electrical problems such as flickering lights can stem from loose connections or an overloaded circuit breaker, which a handyman can safely correct by ensuring secure wiring and balancing the electrical load. Clogged drains are another frequent problem; a handyman can use a plumber’s snake or a drain cleaner to clear the blockage, preventing water backups that can cause damage and mold growth. In instances of creaky floorboards or doors that stick, the solution might be as simple as lubricating hinges or tightening fasteners, which can restore smooth operation without the need for extensive renovations. For more complex issues like a malfunctioning garage door opener, a handyman’s expertise in adjusting mechanisms or replacing parts will ensure your vehicle is safely and efficiently moved. Regular home repair and maintenance checks can help prevent these mishaps from escalating into larger, costlier problems, making it wise to consult a professional handyman for solutions when DIY efforts fall short.
Essential Tools and Materials Every Handyman Should Have for Quick Solutions to DIY Failures

When encountering DIY failures in home repair and maintenance, having a well-equipped toolkit can make all the difference in swiftly resolving issues. A handyman’s arsenal should include versatile tools that cater to a variety of tasks. At the top of this list are the basics such as a reliable set of screwdrivers, pliers, adjustable wrenches, and claw hammers, which are indispensable for tightening, loosening, gripping, and driving nails. For more complex projects, power tools like a drill/driver, circular saw, and cordless screwdriver will prove invaluable. These not only speed up the work process but also enhance precision and efficiency.
In addition to these essentials, every handyman should have a selection of fasteners, adhesives, and sealants on hand for various home repair and maintenance tasks. Sandpaper, paintbrushes, putty knives, and safety equipment such as gloves, goggles, and dust masks are also crucial. For electrical repairs, a multimeter and insulated tools are mandatory to ensure safety and proper function of household appliances and systems. Finally, stocking up on a variety of hardware, such as nails, screws, washers, bolts, and nuts, will prepare you for a wide range of fixes, ensuring that home repair and maintenance challenges can be met with confidence and ease.
Step-by-Step Guide to Effective Home Maintenance Strategies Post-DIY Attempts

When DIY attempts lead to failures, it’s crucial to approach home repairs with a systematic strategy. Begin by assessing the extent of the damage or malfunction. Identify the root cause and gather all necessary tools and materials before starting. A step-by-step guide to effective home maintenance post-DIY mishaps should include:
Firstly, clearly outline the problem. If electrical issues are at hand, ensure the power is off for safety. For leaks or plumbing problems, shut off the water supply. Next, remove any damaged materials or fixtures that cannot be repaired. This might involve taking out a section of drywall, replacing a faulty pipe, or removing a door hinge that won’t hold. Once the damaged elements are removed, proceed with making the necessary repairs. This could entail patching drywall, installing new plumbing, or fitting a new hinge.
After the repair is complete, it’s important to perform a thorough inspection. Check for functionality and ensure there are no leaks or loose parts. If everything appears to be in working order, move on to the final step: finishing touches. This may involve painting, caulking, or any other cosmetic work needed to blend the repair with the rest of your home’s aesthetic. Regular maintenance after such repairs helps prevent future failures and ensures your home remains in good condition. Remember to document each repair for future reference, which can be beneficial for future DIY projects or when calling a professional handyman. By following these steps, you can navigate post-DIY failures with confidence and skill, contributing to the longevity and safety of your home.
Homeowners who have encountered setbacks with DIY repairs can breathe a sigh of relief. The insights provided in this article demystify common mishaps and offer practical, hands-on solutions through handyman expertise, ensuring that home maintenance concerns are addressed promptly and effectively. With the essential tools and materials highlighted, you’re now equipped to tackle future repairs confidently or seek professional assistance when needed. Remember, the key to successful home repair and maintenance lies in knowing the right approach and having the necessary resources at your disposal. By applying the guidance from our step-by-step guide, your home will not only regain its functionality but also maintain its value over time.