To install a swinging glass shower door in Lake Orion, MI:
1. Assess & Measure: Determine space, measure accurately, and mark door position.

2. Gather Tools: Include level, measuring tape, drill, hammer, saw, hinges, caulk, and protective gear.
3. Prepare Frame: Clean, dry, inspect, and repair frame; remove old hinges.
4. Mark Mounting Points: Identify & mark hinge locations on the frame.
5. Drill Pilot Holes: Insert hinges, ensuring level alignment, and secure with screws.
6. Test Swing: Check door's smooth movement and make adjustments if needed.
7. Final Install: Secure hinges firmly, tighten screws, adjust for stability, and caulk for a watertight seal.
Installing a swinging glass shower door can transform your bathroom into a spa-like oasis. This comprehensive guide will walk you through the process of installing hinges on a glass shower door in Lake Orion, Michigan, covering all essential steps from understanding your door to final adjustments. By following these detailed instructions, you’ll learn the tools required for a successful swinging glass shower door installation and ensure a safe, seamless experience.
- Understanding Your Swinging Glass Shower Door
- Gathering the Necessary Tools for Installation
- Preparing the Shower Enclosure for Hinge Mounting
- Attaching the Hinges to the Door Panels
- Aligning and Securing the Hinges for Proper Function
- Testing the Swing and Adjustments as Needed
- Finalizing the Installation: A Safe and Seamless Experience
Understanding Your Swinging Glass Shower Door

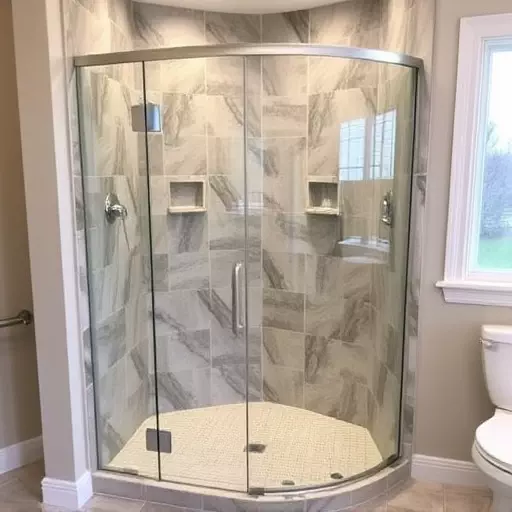
When it comes to installing a swinging glass shower door in Lake Orion, Michigan, understanding the unique mechanics of this type of door is key. A swinging glass shower door operates by pivoting on hinges, allowing for easier entry and exit compared to traditional sliding doors. This section will guide you through the installation process, focusing on the essential steps and tools required.
The first step in installing a swinging glass shower door is assessing your space and ensuring it aligns with the door’s dimensions. Proper measurement guarantees a seamless fit, preventing any issues during the hanging process. Necessary tools for this task include measuring tape, a level, and a marker. Once you’ve determined the correct size, gather the required hinges, which are typically made of durable materials like stainless steel or brass to withstand the high humidity in bathrooms. The installation itself involves attaching the hinges to both the door and the frame, ensuring they’re securely fastened for safe use.
Gathering the Necessary Tools for Installation

To successfully install a swinging glass shower door in Lake Orion, Michigan, you’ll need to gather specific tools tailored for this task. The most common tools required for a swinging glass shower door installation include a level, measuring tape, a drill with various bits (including a 1/4-inch bit and a flat-head screwdriver), a hammer, a saw (hand or power, depending on your preference), and a set of hinges suitable for the weight and size of your door. Additionally, ensure you have silicone caulk, a caulk gun, and protective gear like safety glasses to safeguard against debris.
Following the correct steps and using the right tools are paramount for a seamless installation. Understanding the swinging glass shower door installation process beforehand will help ensure efficiency and accuracy. Begin by measuring and marking the door’s position, ensuring it’s level and aligned correctly. Next, drill pilot holes for the hinges, being mindful of any plumbing or electrical lines. Install the hinges securely, followed by the door, and then caulk around the perimeter for a watertight seal.
Preparing the Shower Enclosure for Hinge Mounting

Before installing hinges on a swinging glass shower door, it’s crucial to prepare your Lake Orion, Michigan shower enclosure properly. Start by ensuring the door is clean and dry, free from any moisture or residue that could interfere with the mounting process. Next, inspect the existing frame to verify its condition and make any necessary repairs or adjustments. The frame should be sturdy and level, as this will ensure a secure and even installation. Remove any old hinges or hardware using appropriate tools, taking note of how the door was originally hung. This step is critical in ensuring a smooth swinging glass shower door installation process.
Identify the mounting points on the frame where the hinges will be attached. Mark these locations clearly to guide your drilling and screwing process. Gather all the necessary tools for swinging shower door installation, including drill bits, screws suitable for glass and metal, and any spacer blocks required to achieve proper alignment. Prepare a checklist of the steps involved in the installation process to ensure nothing is overlooked. This meticulous preparation will make the actual hanging of your new door a breeze.
Attaching the Hinges to the Door Panels

When attaching hinges to your glass shower door panels, ensure that all tools are at hand—you’ll need a drill with a small bit, a level, and possibly an assistant. Start by marking the hinge locations on the door panel(s) using a pencil or marker; this ensures precise alignment during installation. Next, use the level to verify that the marks are straight and even, as any misalignment could affect the door’s functionality.
Drill pilot holes at each mark, taking care not to drill too deeply. Insert the hinge pins into the holes and secure them with screws from the opposite side of the panel. This process should be repeated for all hinges on both door panels, ensuring a balanced setup that allows for smooth swinging motion during your glass shower door installation in Lake Orion, Michigan.
Aligning and Securing the Hinges for Proper Function

When installing hinges on a swinging glass shower door, proper alignment is key to ensure smooth and seamless operation. Begin by positioning the door in its desired location, ensuring it swings freely in both directions. Mark the hinge mounting points on the door and frame using a pencil, creating reference points for accurate placement. The hinges should be centered and level, allowing for equal clearance on each side when the door is swung open.
Secure the hinges firmly using the appropriate hardware, typically including screws or anchor bolts. Make sure the hinges are tightly fastened to both the door and frame to prevent any movement or shifting during use. Cross-reference the manufacturer’s instructions with your specific hinge model for the correct tightening sequence and torque specifications. With proper alignment and secure installation, your swinging glass shower door in Lake Orion, Michigan, will provide easy access and a sleek, modern aesthetic.
Testing the Swing and Adjustments as Needed

After you’ve secured one hinge to the glass panel, it’s crucial to test the swing and make adjustments as needed before installing the rest. Swing the door gently back and forth to ensure smooth movement and check for any obstacles that might hinder its operation. If the door catches or doesn’t swing freely, take a step back and re-evaluate your measurements, ensuring that all hinges are level and aligned correctly. Make any necessary adjustments to the hinges’ positioning.
The tools required for a swinging glass shower door installation in Lake Orion, Michigan, include a level, a drill with appropriate bits, a measuring tape, and a screwdriver. These tools will help you ensure a secure and precise fit, allowing you to complete your swinging glass shower door installation steps efficiently.
Finalizing the Installation: A Safe and Seamless Experience

Finalizing the installation of a swinging glass shower door ensures a safe and seamless experience for your bathroom. Once the hinges are securely attached, double-check all connections to ensure they’re tight and stable. This involves tightening any loose screws using a screwdriver and adjusting the door’s alignment if needed. Proper alignment is crucial for smooth operation, preventing rubs against the frame or misalignment that could lead to water leaks.
The right tools are essential for a successful swinging glass shower door installation. You’ll need basic tools like a measuring tape, level, pencil, hammer, and screwdriver. For more complex installations, consider an adjustable wrench and silicone caulk for sealing. Always follow manufacturer instructions regarding tool requirements specific to your door model. Safety is paramount; wear protective gear such as safety goggles during the installation process.