
Understanding your car's audio system is crucial for successful car audio installations in Toledo, whether DIY or professional. Modern stereos include components like head units, amplifiers, speakers, subwoofers, and signal processors, each affecting sound quality and connectivity. DIY enthusiasts use this knowledge to select equipment wisely, while professionals tailor systems to vehicle needs while adhering to safety standards. Proper installation, including grounding and shielding, prevents short circuits and ensures optimal sound quality. Post-installation checks include adjusting volume, verifying sound distribution, testing settings, connections, and remote functionality, plus inspecting for damage or incorrect wiring.
Looking to elevate your in-car listening experience? This comprehensive guide to car audio installation covers everything from DIY tips to professional techniques, ensuring you get the ultimate sound system for your vehicle. We break down the process step-by-step, from understanding your car audio system to overcoming common challenges and performing post-installation checks. Whether you’re in Toledo or beyond, master the art of DIY car audio installation or discover the benefits of a professional grade setup.
- Understanding Your Car Audio System: A Comprehensive Overview
- Tools and Equipment Required for a Successful DIY Installation
- Step-by-Step Guide to Professional-Grade Car Audio Installation
- Common Challenges and How to Overcome Them During Installation
- Post-Installation Checks: Ensuring Optimal Sound Quality and Safety
Understanding Your Car Audio System: A Comprehensive Overview
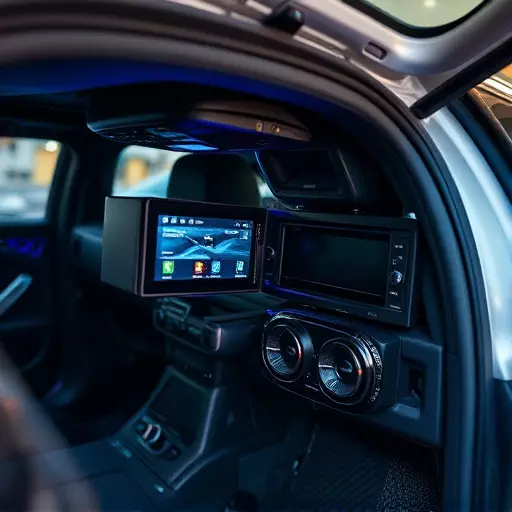
Understanding your car’s audio system is a crucial step before attempting any kind of car audio installation in Toledo, whether it’s a DIY project or a professional setup. The modern car stereo system is a complex network of components designed to deliver optimal sound quality and connectivity. Familiarize yourself with the various parts, including the head unit (dashboard display), amplifier, speakers, subwoofers, and signal processing modules. Each component plays a vital role in audio performance, from reproducing clear highs to powerful bass and ensuring seamless integration with your vehicle’s electrical system.
For DIY enthusiasts, this knowledge allows you to make informed choices when selecting compatible equipment for your car audio installation. Professional installers use this understanding to tailor systems that cater to specific vehicle needs, maximizing sound quality while adhering to safety standards. By comprehending the fundamentals, you can navigate the market effectively, whether sourcing parts or seeking expert advice on car audio installation services in Toledo, ensuring a successful and satisfying audio experience behind the wheel.
Tools and Equipment Required for a Successful DIY Installation

When taking on a car audio installation in Toledo, whether as a DIY project or aiming for a professional setup, having the right tools and equipment is paramount. For a successful diy car audio installation, consider investing in a range of essential tools designed specifically for automotive applications. This includes items like specialized screwdrivers (both flathead and Phillips), wire strippers, crimping tools, and a voltmeter to ensure safe and accurate wiring.
Additionally, don’t underestimate the value of high-quality connectors, cables, and mounting kits tailored for your car model. These components directly impact sound quality and system reliability. Professional installers often rely on advanced equipment like precision cutters, laser measuring tools, and industrial-grade adhesives, ensuring a neat and durable installation that leverages the full potential of your car audio system.
Step-by-Step Guide to Professional-Grade Car Audio Installation

Step-by-Step Guide to Professional-Grade Car Audio Installation
When it comes to car audio installation Toledo, whether you’re opting for a DIY project or aiming for professional-grade setup, understanding the process is key. Start by gathering all necessary components, including amplifiers, speakers, and cables. Ensure compatibility with your vehicle’s make and model. Next, locate the ideal spots for your amplifiers and speakers, considering both optimal sound projection and aesthetics. Cut and route wires carefully, using heat shrink tubing to protect them from damage. Connect everything according to the wiring diagram, ensuring secure connections.
For a truly professional touch, consider in-dash installation or custom fabrication. This might involve replacing your existing radio with an aftermarket head unit for enhanced features and better sound quality. Alternatively, custom panels can be crafted to seamlessly integrate larger speakers or subwoofers into your dashboard or doors. Remember, proper grounding is crucial for safety and optimal performance. Once all components are in place, test the system thoroughly, adjusting equalization settings for balanced audio across all frequencies.
Common Challenges and How to Overcome Them During Installation

During a car audio installation, several common challenges can arise, but with careful planning and the right approach, these can be easily overcome. One of the primary hurdles is fitting the components seamlessly into the vehicle’s interior without damaging existing parts or compromising safety. This often requires precise measurement and consideration of space constraints, especially in older models. A DIY car audio installation might necessitate adaptive solutions, but it’s crucial to ensure the right fitment and compatibility to avoid issues later.
Professional installers leverage specialized tools and a deep understanding of vehicle architecture to navigate these challenges. They know how to modify panels and harness existing wiring efficiently, ensuring a clean and secure setup. Moreover, integrating new audio systems with the car’s electrical system without causing short circuits or power glitches is paramount. Proper grounding and shielding are essential techniques used to prevent such issues, guaranteeing both optimal sound quality and vehicle safety.
Post-Installation Checks: Ensuring Optimal Sound Quality and Safety

After completing a car audio installation, whether DIY or professional, it’s crucial to conduct thorough post-installation checks to ensure optimal sound quality and safety. Start by connecting your new system and adjusting the volume to a comfortable level. Move around the vehicle to verify that sound is evenly distributed across all speakers—this ensures a balanced listening experience regardless of where you sit.
Next, test the various settings and controls, including bass and treble adjustments, equalization options, and any specialized features unique to your audio system. Ensure that all connections are secure and tight, checking for any loose wires or faulty cables. Verify the functionality of the remote control or smartphone app (if applicable) and familiarize yourself with its capabilities. Lastly, inspect the installation for any signs of damage or incorrect wiring, ensuring that everything aligns with safety standards and manufacturer recommendations for a seamless and enjoyable audio experience.