Maintaining streak-free and easy-to-clean shower glass in Toledo requires understanding and implementing proper shower glass protectant application techniques. Key steps include choosing the right product, cleaning and drying the glass, applying a thin layer using a lint-free cloth or spray bottle, and letting it dry as per manufacturer instructions. Essential tools and materials include high-quality glass protectant, a spray bottle with fine mist settings, soft cloths, and a clean rag. Proper surface preparation, such as pre-cleaning and treating problem areas, enhances the effectiveness of the protectant. Avoiding mistakes like improper surface preparation and over-spraying is crucial for successful DIY applications. Regular reapplication using a microfiber cloth keeps the protectant effective and simplifies cleaning. High-quality protectants formulated for shower glass extend their lifespan and provide a beautiful, streak-free experience in Toledo.
“Elevate your shower experience with expert tips on shower glass protectant application in Toledo. This comprehensive guide covers everything from understanding the basics of protectant application to advanced DIY techniques. Learn about essential tools and materials for a successful project. Discover effective step-by-step methods, surface preparation tricks, and how to avoid common mistakes. Finally, explore maintenance tips to ensure your shower glass protectant remains potent, enhancing your bathroom’s vibrant appearance.”
- Understanding Shower Glass Protectant Application: A Primer
- Essential Tools and Materials for DIY Protectant Application
- Step-by-Step Guide: Effective Shower Glass Protectant Techniques
- Maximizing Protection: Surface Preparation and Pre-Treatment Tips
- Common Mistakes to Avoid During the Application Process
- Maintenance and Longevity: Ensuring Your Protectant Remains Effective
Understanding Shower Glass Protectant Application: A Primer
When it comes to maintaining your shower glass in Toledo, proper protectant application is key. Understanding the process and techniques behind shower glass protectant application goes a long way in ensuring a streak-free, easy-to-clean surface. Start by choosing the right product for your needs; there are various options available designed specifically for shower glass to prevent water spots and mineral buildup.
For an effective DIY glass protectant application, follow these simple steps: first, ensure the glass is clean and dry. Next, apply a thin, even layer of the protectant using a lint-free cloth or spray bottle. Work in small sections for better control and to avoid overspray. Allow the product to dry as per the manufacturer’s instructions before enjoying your shiny, protected shower glass. Proper application techniques will not only extend the life of your protectant but also enhance its effectiveness against soap scum and hard water stains.
Essential Tools and Materials for DIY Protectant Application
When it comes to DIY shower glass protectant application in Toledo, the right tools and materials are essential for achieving a professional finish. For this project, you’ll need a few key items to ensure the best results. Start with a high-quality glass protectant designed specifically for shower surfaces. Look for products that offer long-lasting protection against water spots and stains. Additionally, gather a spray bottle, soft cloths or sponges, and a clean rag for wiping away any excess product.
To effectively apply the protectant, opt for a spray bottle with fine mist settings. This allows you to evenly distribute the solution across the shower glass without creating puddles or overspray. Soft cloths or sponges are ideal for applying the protectant, as they won’t scratch the surface. After spraying, use a clean rag to wipe away any residual product, leaving behind a streak-free, protected finish. Employing these DIY glass protectant application techniques will help maintain your shower’s appearance and extend its lifespan.
Step-by-Step Guide: Effective Shower Glass Protectant Techniques
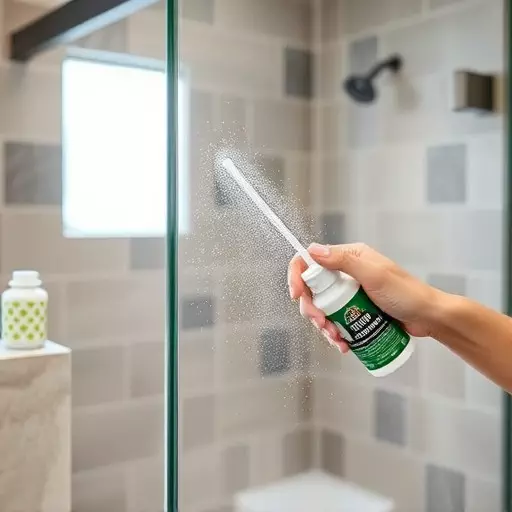
Applying a shower glass protectant is an easy DIY project that can significantly enhance your bathroom’s hygiene and appearance. Start by gathering your supplies, which include a high-quality glass protectant spray or gel, a clean microfiber cloth, and possibly a rubber spatula for spreading (if using a gel). Before application, ensure the shower glass is thoroughly cleaned and completely dry to achieve the best results.
Now, follow these step-by-step techniques: spray the protectant evenly across the entire surface of the shower glass, ensuring even coverage; allow the first coat to dry as per the product’s instructions; if using a gel, use the spatula to spread it smoothly and evenly; wipe away any excess with the microfiber cloth; let the final coat dry completely before using the shower.
Maximizing Protection: Surface Preparation and Pre-Treatment Tips

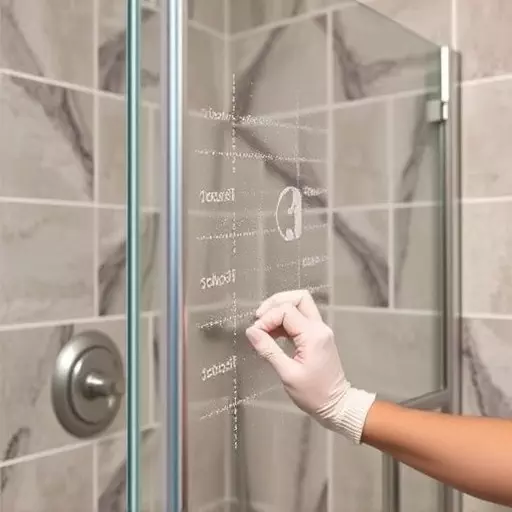
To maximize protection from water spots and stains when applying a shower glass protectant in Toledo, proper surface preparation is key. Begin by thoroughly cleaning the glass using a non-streaking glass cleaner to remove any dirt, soap residue, or minerals. This ensures an even application of your chosen protectant and enhances its longevity. The next step involves pre-treating any problem areas, such as water stains or hard water deposits. Use a specialized cleaner designed to break down these residues, ensuring they’re fully removed before protection is applied.
For an effective DIY glass protectant application, consider using a microfiber cloth to spread the product evenly across the surface. Start from the top and work your way down to avoid streaking. Follow the manufacturer’s instructions regarding waiting times between applications and after the final coat to allow full drying and curing. This meticulous preparation not only enhances the effectiveness of the protectant but also contributes to longer-lasting results, keeping your shower glass looking pristine for longer.
Common Mistakes to Avoid During the Application Process

When applying a shower glass protectant in Toledo, DIY enthusiasts often make mistakes that can compromise the effectiveness of the product. One common error is improper surface preparation; it’s crucial to ensure the glass is clean, dry, and free from any residue or soap scum before application. Skipping this step results in an uneven coating and reduced longevity of the protectant.
Another mistake to avoid is over-spraying or applying too much product. Using excessive force or failing to maintain a consistent distance from the glass can lead to overspray, creating unsightly streaks and wastage. Instead, use a fine mist and work in small sections, allowing each area to dry slightly before moving on to ensure even coverage.
Maintenance and Longevity: Ensuring Your Protectant Remains Effective

Regular maintenance is key to keeping your shower glass protectant effective and extending its lifespan. After initial application, follow up with periodic reapplication, especially in high-moisture environments or after cleaning. Use a microfiber cloth to apply fresh coats of the protectant evenly, ensuring full coverage without any streaks. This simple DIY glass protectant application technique not only keeps your shower looking new but also repels water and dirt, making cleaning easier.
For optimal results, consider the frequency of your reapplication based on usage. High-traffic areas may require more frequent touch-ups. Additionally, using a good quality protectant formulated for shower glass will enhance its durability. Remember, a well-maintained protectant means less frequent replacements and a more beautiful, streak-free shower experience in Toledo.