Dual-flush toilets, an eco-friendly option, offer water efficiency. Using Toilet Installation Tools Toledo for DIY installation involves precise measurement, cutting, and plumbing connections, enhancing bathroom aesthetics and conservation efforts. Before starting, verify compatibility and local building codes. Meticulously assess space and plumbing setup to ensure a seamless fit and successful DIY Toilet Installation. Remove the old toilet, install the new one, connect water lines, test for leaks, and adjust settings for optimal efficiency and comfort.
“Upgrading your bathroom with a dual-flush toilet can significantly enhance water conservation and provide a sleek, modern design. This comprehensive guide will walk you through the entire DIY toilet installation process, from gathering the essential toilet installation tools Toledo to final touches and testing. Understanding the toilet installation process involves recognizing the features and benefits of these innovative toilets, ensuring proper preparation, and following a step-by-step removal of the old unit. Get ready to install your new dual-flush toilet efficiently.”
- Understanding the Dual-Flush Toilet: Features and Benefits
- Gathering the Right Toilet Installation Tools Toledo
- Preparation: Measuring and Evaluating Your Space
- Removing the Old Toilet: A Step-by-Step Guide
- Installing the New Dual-Flush Toilet: A Detailed Process
- Final Touches and Testing: Ensuring a Smooth Operation
Understanding the Dual-Flush Toilet: Features and Benefits

Dual-flush toilets offer a sophisticated and efficient way to manage water usage in your home. Unlike traditional models with a single flush option, these toilets provide two settings – a smaller flush for liquid waste and a larger one for solid debris. This dual functionality not only reduces water consumption but also minimizes noise levels and waste, making them an eco-friendly choice.

During the toilet installation process, especially when using Toledo Toilet Installation Tools, homeowners opting for a DIY approach can easily integrate this feature. The installation process involves careful measurement, precise cutting, and connecting the necessary plumbing components to accommodate the dual-flush mechanism. By understanding these features and benefits, you’re not just enhancing your bathroom aesthetics but also contributing to water conservation – a win-win for both your home and the environment.
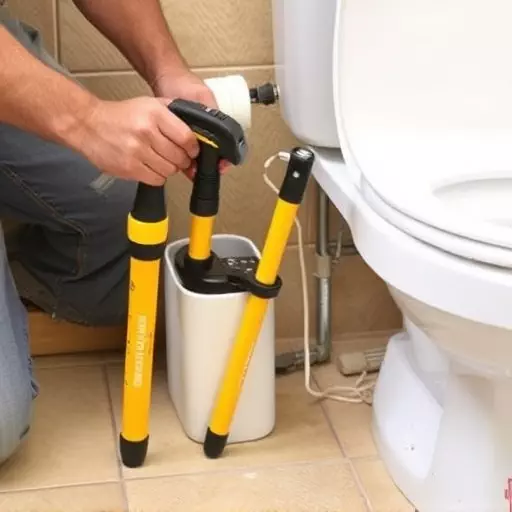
Gathering the Right Toilet Installation Tools Toledo
When tackling a dual-flush toilet installation in Toledo, gathering the right Toilet Installation Tools Toledo is the first step to ensure a smooth and successful DIY toilet installation process. You’ll need a variety of tools depending on your specific model, but some essentials include an adjustable wrench, pliers, a screwdriver (both flathead and Phillips), a measuring tape, and a level. These tools will allow you to remove the old toilet, properly position the new dual-flush model, and securely attach all components, ensuring a proper seal and water-tight connection.
Having the right tools is only half the battle; proper preparation and knowledge of the toilet installation process are equally vital. Before beginning, double-check that your new toilet is compatible with your existing plumbing setup and consider consulting your local building codes for any specific requirements or restrictions regarding dual-flush toilets in Toledo. This proactive approach will save you time, frustration, and potential costly repairs down the line.
Preparation: Measuring and Evaluating Your Space
Before you begin the actual installation process, it’s crucial to assess your space and plan accordingly. Measuring your existing toilet area is the first step in this preparation phase. Use a tape measure to determine the height, width, and depth of the space where you intend to install the new dual-flush toilet. This measurement will help you select a model that fits seamlessly without any adjustments or modifications to the floor or wall.
Additionally, evaluating the plumbing setup is an integral part of DIY toilet installation (toilet installation tools Toledo). Check if your existing pipes are compatible with the new toilet’s requirements. The last thing you want is to realize mid-installation that your water supply lines need to be reconfigured. Ensure access to both cold and hot water supplies, as well as a suitable waste pipe connection, before proceeding with any toilet installation process.
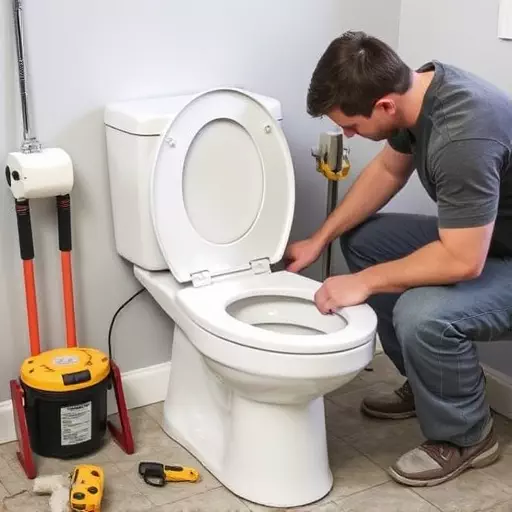
Removing the Old Toilet: A Step-by-Step Guide

Removing an old toilet is a crucial step in any DIY toilet installation process. It requires some basic tools and a systematic approach to ensure the job is done safely and efficiently. Start by shutting off the water supply to your toilet, typically located behind the tank or in the basement. This prevents any accidents during the removal process. Next, use a wrench or slip-joint pliers to loosen and detach the supply lines connected to the old toilet. Once these are removed, you can begin disassembling the toilet itself.
Gently rock the toilet back and forth while applying leverage with your hands to loosen its hold on the floor. You might need to use a tool like a pry bar or toilet removal tool to help lift and detach it from the mounting bolts. Be careful not to damage the flooring underneath. Once the toilet is free, carefully remove it from the bathroom, taking note of any hardware or accessories that need to be reused or replaced during your new toilet installation.
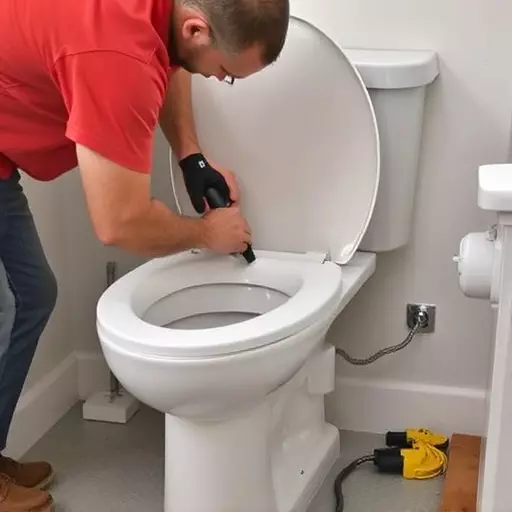
Installing the New Dual-Flush Toilet: A Detailed Process

Installing a new dual-flush toilet is a relatively straightforward process that can be accomplished with the right tools and some basic DIY skills. First, gather all the necessary Toilet Installation Tools Toledo, including the new dual-flush toilet, a wrench or pliers, and any other hardware provided with the unit. Remove the old toilet by detaching the supply lines and carefully lifting it out of the bowl. Once the old toilet is removed, clean the area thoroughly to ensure a smooth installation.
Next, position the new dual-flush toilet in place, aligning it carefully with the mounting holes. Secure it with bolts or screws, ensuring a firm fit. Connect the water supply lines, following the manufacturer’s instructions for proper alignment and tension. After tightening the connections, test the water flow to verify there are no leaks. Finally, adjust the dual-flush mechanism according to your preferences, ensuring both flush options function correctly. With these steps completed, your DIY Toilet Installation is now ready for use, offering a more efficient and eco-friendly bathroom experience.
Final Touches and Testing: Ensuring a Smooth Operation

After completing the installation of your dual-flush toilet, it’s time to perform the final touches and testing to ensure a smooth operation. This involves checking all connections for any leaks, tightening any loose parts using the appropriate Toilet Installation Tools Toledo, and ensuring both flush mechanisms function correctly. Fill the tank with water and observe if there are any drips or unusual noises, indicating potential issues that need addressing.
Testing each flush setting is crucial to verify their efficiency and comfort. Ensure that the weaker flush clears the bowl effectively while using less water, and the stronger flush provides sufficient cleaning force without excessive water waste. If DIY Toilet Installation was your chosen route, congrats on a job well done! Remember, proper testing and adjustments at this stage can prevent future problems, guaranteeing your new dual-flush toilet operates seamlessly for years to come.