To successfully install a gravity-feed toilet in Toledo, you'll need tools such as a wrench set, screwdriver, hacksaw, and plumber's tape, along with materials like a new wax ring, flange bolt kit, and sealant. The process involves shutting off the water supply, draining the old toilet, removing the old wax ring, cutting off the old flange if necessary, installing a new flange if needed, placing a new wax ring on the toilet base, positioning the toilet onto the wax ring, securing it to the floor with bolts, connecting the water and waste pipes, ensuring everything is aligned and tight, wrapping joints with plumber's tape to prevent leaks, caulking the top edge of the toilet where it meets the floor for a watertight seal, and finally checking the entire installation for any potential leaks. Adherence to this process and local building codes will ensure a compliant and efficient system, while also preventing future maintenance issues. For those who are not confident in their DIY skills, professional assistance is recommended.
Embarking on a toilet installation project can be a straightforward task with the right guidance and tools at hand. In Toledo, homeowners and DIY enthusiasts alike can benefit from mastering the gravity-feed toilet system, a staple in modern bathrooms for its efficient operation. This comprehensive article demystifies the process, from gathering the essential tools for Toilet Installation Tools Toledo to navigating each step of the Toilet Installation Process with precision. We’ll explore the components of a gravity-feed toilet system and provide a detailed, step-by-step guide for connecting your water supply and waste pipes. By following our DIY Toilet Installation protocol, you’ll ensure a seamless installation, culminating in proper sealing, caulking, and testing. Additionally, we’ll outline best practices for maintaining your system to uphold its performance. With these insights, you’re well-equipped to manage your next toilet installation with confidence.
- Preparing for Toilet Installation with the Right Tools in Toledo
- Step-by-Step Guide to the Gravity-Feed Toilet Installation Process
- Understanding the Components of a Gravity-Feed Toilet System
- Steps to Connect the Water Supply and Waste Pipes for Your New Toilet
- Finalizing Your DIY Toilet Installation: Sealing, Caulking, and Testing
- Best Practices for Maintaining Your Gravity-Feed Toilet in Toledo
Preparing for Toilet Installation with the Right Tools in Toledo

When tackling a DIY toilet installation in Toledo, having the right tools and understanding the process are crucial for a successful project. Before beginning, gather your toilet installation tools, which include a new wax ring, a toilet flange positioner, a marking pencil, a level, a screwdriver or drill with the appropriate bits, a handsaw or reciprocating saw, a wrench set, plumber’s tape, a toilet jacket or shims, and a garden hoe or similar tool for excavation. Ensure you also have a bucket and sponge for cleanup, as well as a towel to protect your floor during the installation process.

The toilet installation process in Toledo begins with the removal of the old toilet, if one exists. Turn off the water supply to the toilet and flush the tank to drain the remaining water from the bowl. Use the wrench to disconnect the water supply line and remove the nuts securing the water tank and any bolts holding the toilet to the floor. Carefully lift the toilet off its base, being mindful of any residual waste in the old wax ring. Prepare the area by cleaning up any debris and ensuring a level surface for the new toilet. Position the new flange over the sewer line, apply the wax ring on the bottom of the new toilet base, and gently set the toilet into place, rocking it slightly to press the wax ring against the flange and ensure a watertight seal. Secure the toilet bolts through the closet flange and into the toilet at the correct height as indicated by local plumbing codes. Once the toilet is securely in place, connect the water supply line, reattach any covenant connections, and turn on the water to test for leaks. Finally, caulk the base of the toilet to the floor for a neat finish, completing your DIY toilet installation in Toledo.
Step-by-Step Guide to the Gravity-Feed Toilet Installation Process

When undertaking a DIY toilet installation using the gravity-feed system, having the right tools on hand is paramount for a smooth process. The necessary tools for toilet installation in Toledo, Ohio, or any region, typically include a level, measuring tape, a marking crayon or pencil, a screwdriver set, a wrench set, a handsaw or reciprocating saw, a hammer, a carpenter’s square, and a toilet installation kit that includes wax rings, closet bolts, and a toilet flange. Before beginning, ensure you have also acquired the specific model of the toilet you are installing, as well as any compatible connection fittings if your existing plumbing requires modifications.
The toilet installation process involves several key steps to ensure proper functioning and compliance with local building codes. Begin by shutting off the water supply to the existing toilet and flushing the tank to drain the remaining water from the system. Next, remove the old wax ring from the bottom of the old toilet and carefully set it aside without contamination. Use the reciprocating saw to cut through the old bolts, allowing for the old toilet’s removal. Place the new wax ring on the closet flange in the floor, position the new toilet over the sewer line, and press down firmly to create a good seal. Then, attach the closet bolts through the toilet base into the flange, ensuring they are tight enough to secure the toilet but not so tight as to crack the porcelain. After securing the toilet, connect the water supply lines, applying new washers where necessary. Once the water line is secured and any leaks are resolved, the final step is to test the installation by flushing the toilet to ensure that it functions properly and that there are no leaks at the base or connections. Always refer to the manufacturer’s instructions for specific model-related details, as some may have unique installation requirements.
Understanding the Components of a Gravity-Feed Toilet System

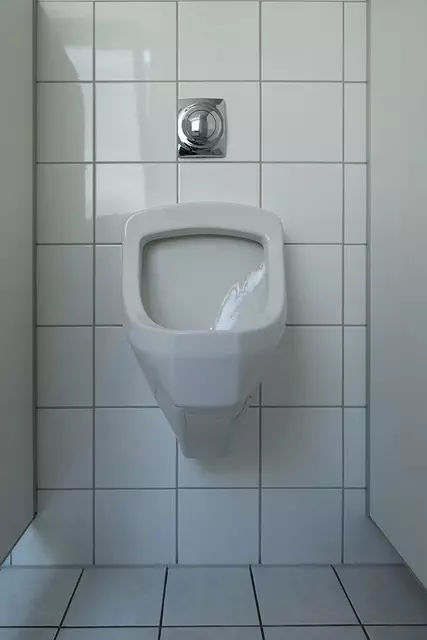
A gravity-feed toilet system is a fundamental component of modern plumbing and central to any effective household sanitation. To successfully install this type of toilet, one must first have an understanding of its key components. The primary elements include the water tank, flush valve, siphon jet, trapway, bolts, and washers. The water tank stores and releases water under gravity for flushing; it is typically connected to a fill valve that regulates the flow of water into the tank. The flush valve, also known as the flapper or ballcock, controls the release of water into the toilet bowl during a flush. The siphon jet creates the siphonic action that effectively clears the bowl, while the trapway ensures waste flows smoothly from the bowl to the sewer line. Proper installation tools, such as a level, wrench set, screwdriver, and a hacksaw for cutting pipes, are essential for a DIY toilet installation. The process begins with marking the floor where the bolts will be placed, followed by attaching the base to these bolts. Next, one must connect the water supply line, seal the base, and adjust the fill valve to ensure proper operation. Throughout the toilet installation process in Toledo or any location, it’s crucial to adhere to local plumbing codes and regulations for a compliant and efficient system. The Toilet Installation Process in Toledo can be undertaken with careful planning and attention to detail, ensuring that the gravity-feed toilet system functions optimally and enhances the comfort and hygiene of your home.
Steps to Connect the Water Supply and Waste Pipes for Your New Toilet

To initiate the installation of your gravity-feed toilet in Toledo, gathering the appropriate tools and materials is paramount. Essential toilet installation tools for this project include a wrench set, plumber’s tape, a screwdriver, a hacksaw, a level, a measuring tape, and a pencil. Additionally, you’ll need a new wax ring, a toilet flange bolt kit, a shutoff wrench for the water main, and flexible couplings if adjustments to the existing water supply lines are necessary. Once your tools and materials are ready, you can proceed with the process.
Begin by shutting off the water supply to the bathroom where the new toilet will be installed. Use the shutoff wrench to turn off the valve completely. Drain any remaining water in the old toilet by flushing it if there is still water left. Remove the old wax ring around the base of the former toilet and discard it. Next, carefully detach the water supply lines from the back of the old toilet and disconnect the waste pipe. Prepare the flange area by cleaning out any debris or old wax. Install the new flange if required, ensuring it’s at the correct height for a secure fit. Position the new wax ring on the bottom of the toilet base, aligning it with the outlet hole. Carefully lower the toilet into place, pressing down to create a seal with the wax ring. Secure the toilet to the floor by driving bolts through the bases and into the wall studs or concrete, using a level to ensure it’s perfectly aligned for a seamless installation.
Connect the water supply lines to the toilet’s inlet valve, wrapping each connection with plumber’s tape to prevent leaks. Attach the waste pipe to the toilet’s outlet, ensuring a snug fit and proper alignment for optimal function. Finally, check for leaks at all connections by gently tightening any loose fittings. With the DIY toilet installation process complete, your new gravity-feed toilet in Toledo should be operational and ready for use. Always follow local building codes and consider consulting with a professional plumber if you encounter challenges during the installation.
Finalizing Your DIY Toilet Installation: Sealing, Caulking, and Testing

When finalizing your DIY toilet installation in Toledo using the gravity-feed system, sealing and caulking are critical steps to ensure watertight integrity and prevent leaks. Begin by cleaning the base of the toilet and the floor around it thoroughly to remove any debris or grout dust that could interfere with a proper seal. Use a quality silicone or wax-based toilet sealant, as recommended in the Toilet Installation Tools Toledo guide, to apply a bead of caulk along the top edge of the toilet base where it meets the floor. Press the toilet firmly into place, ensuring that the sealant fills any gaps and creates a solid bond. Wipe off any excess caulk with a damp cloth before it dries, for a clean and professional finish.
Once the caulking has set, proceed to the next phase of the Toilet Installation Process: testing the installation for leaks. Connect the water supply lines, ensuring all fittings are tight and secure. Turn on the water source gradually to allow air to escape from the tank and bowl. Inspect the entire connection for any signs of drips or moisture seepage. If you encounter leaks, carefully disassemble the affected area, reapply caulk as necessary, and retest until there are no leaks. After confirming a leak-free installation, let the system run for a short period to check for stability in the seal. This step is crucial, as it not only ensures the functionality of your new toilet but also prevents potential water damage to your home. A well-executed DIY Toilet Installation in Toledo can save you time and money while providing peace of mind that your installation is both secure and efficient.
Best Practices for Maintaining Your Gravity-Feed Toilet in Toledo

When maintaining a gravity-feed toilet in Toledo, understanding the installation process is key to ensuring its longevity and efficiency. The first step in effective maintenance is using the correct tools for toilet installation as per the guidelines of Toilet Installation Tools Toledo. Essential tools typically include a wrench set, plumber’s putty, a screwdriver, a level, a hacksaw, and a toilet installation kit that may come with a wax ring and bolt kit. These tools are instrumental in both the initial setup and any subsequent repairs or adjustments.
During installation, it’s crucial to follow the toilet installation process meticulously to avoid leaks or misalignments. Begin by shutting off the water supply and draining the existing toilet. Next, remove the old toilet, being careful not to damage the flange at the base of the waste pipe. Install the new wax ring on the bottom of the new toilet and gently set it into place over the drain, ensuring a proper seal. Connect the toilet to the water supply, secure it to the floor with the provided bolts, and use the level to confirm that the toilet is sitting flat and evenly for optimal performance. After installation, regularly check the components like the flapper, fill valve, and handle for wear and tear. Clean the toilet regularly using non-abrasive cleaners to prevent damage to the surfaces. Performing a DIY toilet installation with attention to detail and regular maintenance can help ensure that your gravity-feed toilet operates smoothly for years to come in Toledo’s unique environmental conditions.