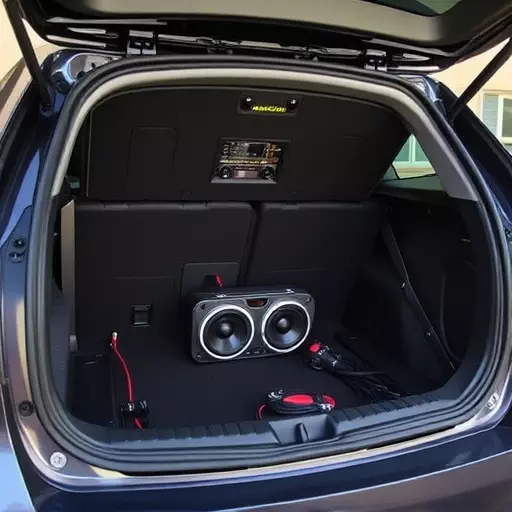
Installing an in-dash receiver enhances your vehicle's interior, transforming it into a mobile entertainment hub. The process requires compatibility checks, meticulous wiring, and fine-tuning for sound quality. A comprehensive guide caters to both DIY enthusiasts (tools, safety, troubleshooting) and professionals (expectations, tailored solutions). Key steps include cleaning the dashboard, precise measurement, marking, wiring connections, and testing functionalities for optimal performance. In Toledo, whether DIY or professional, selecting the right receiver and proper installation are crucial for a superior car audio experience, addressing compatibility challenges and spatial constraints.
“Elevate your driving experience with our comprehensive guide to in-dash receiver installation. Whether you opt for a DIY car audio installation in Toledo or consider professional services, understanding the process is key. From selecting the right in-dash receiver for your vehicle to overcoming installation challenges, we’ve got you covered. Learn about the benefits of each approach and prepare your car for optimal sound performance. Dive into our step-by-step instructions and ensure a seamless audio setup.”
- Understanding In-Dash Receiver Installation: A Comprehensive Guide
- Choosing the Right In-Dash Receiver for Your Car Audio Installation in Toledo
- Benefits of DIY Car Audio Installation vs Professional Services
- Preparing Your Vehicle for the Installation Process
- Step-by-Step Instructions for In-Dash Receiver Installation
- Common Challenges and How to Overcome Them During Installation
- Post-Installation Checks: Ensuring Optimal Performance
Understanding In-Dash Receiver Installation: A Comprehensive Guide

In-dash receiver installation is an art that combines precision, technical know-how, and a passion for enhancing vehicle interiors. It’s more than just fitting a new device; it’s about seamlessly integrating cutting-edge technology into your car, transforming it into a mobile entertainment hub. Whether you’re considering a DIY car audio installation in Toledo or planning to seek professional car audio installation services, understanding the process is key.
A comprehensive guide should demystify the steps involved, from assessing your vehicle’s compatibility to selecting the right receiver, wiring it meticulously, and fine-tuning the system for optimal sound quality. For those embracing DIY car audio installation, this guide offers valuable insights into tools required, safety precautions, and troubleshooting common challenges. Conversely, those opting for professional car audio installation can use it to communicate their expectations effectively, ensuring a tailored solution that leverages expert skills and advanced equipment.
Choosing the Right In-Dash Receiver for Your Car Audio Installation in Toledo

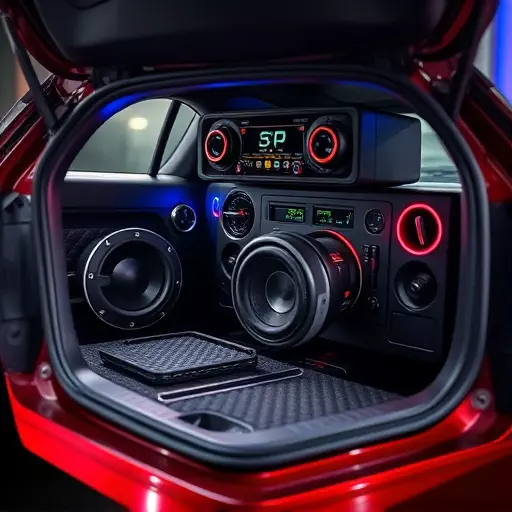
When it comes to enhancing your car’s audio experience in Toledo, selecting the ideal in-dash receiver is a pivotal first step in any DIY or professional car audio installation project. Consider your vehicle’s make and model when choosing an in-dash receiver, as compatibility is key. Ensure the receiver seamlessly integrates with your car’s existing electrical system for hassle-free installation. For a DIY approach, opt for models with user-friendly interfaces and clear instructions to simplify the process.
Professional car audio installers in Toledo recommend assessing your specific needs before making a purchase. Features such as Bluetooth connectivity, smartphone integration, and advanced sound processing capabilities can transform your driving experience. Moreover, high-quality receivers offer better sound clarity and power handling, ensuring an optimal listening experience for music enthusiasts. Whether you’re aiming to upgrade your car’s audio system yourself or seeking professional expertise in Toledo, choosing the right in-dash receiver is a crucial decision that will set the stage for a superior car audio installation.
Benefits of DIY Car Audio Installation vs Professional Services

Many car owners wonder whether it’s better to install their own in-dash receiver or hire a professional. DIY car audio installation in Toledo offers several advantages. First, it allows for customization and control over every step of the process, ensuring the perfect fit and functionality tailored to your vehicle. Secondly, it can be a cost-effective option, as you avoid labor fees charged by professional services. Moreover, gaining hands-on experience with DIY car audio installation in Toledo enhances your technical skills and provides a sense of accomplishment.
On the other hand, professional car audio installation has its benefits too. Experts bring specialized knowledge and tools to ensure a seamless, precise fit. They can offer advanced recommendations for system optimization based on your vehicle’s unique characteristics. Professional services also come with warranties that cover both labor and equipment, providing peace of mind. Ultimately, the choice depends on individual preferences, budget, and comfort level with technical tasks.
Preparing Your Vehicle for the Installation Process
Before tackling the in-dash receiver installation process, preparing your vehicle is a crucial step that shouldn’t be overlooked. Start by ensuring your car audio installation Toledo or DIY efforts are facilitated by a clean and organized dashboard area. Remove any loose debris, and consider using a vacuum to thoroughly clean the surface where the new receiver will sit. This ensures a neat appearance and allows for easier access during future maintenance.
Additionally, verify that all existing components, such as wires and sensors, are in good condition and routed properly. This includes checking the power and signal cables connected to your vehicle’s stereo system. Professional car audio installation experts often recommend marking or documenting these connections before loosening them to simplify the reattachment process later on.
Step-by-Step Instructions for In-Dash Receiver Installation

Step-by-Step Instructions for In-Dash Receiver Installation
Before starting the in-dash receiver installation, ensure you have all the necessary tools and components. This includes the new in-dash receiver, double-face tape, and any additional wiring harnesses or adapters. For a DIY car audio installation in Toledo, gather your materials and follow these steps: begin by removing the existing stereo from its mounting location. This may involve detaching power and signal cables, as well as releasing the stereo from clips or screws holding it in place. Once the old receiver is out, clean the dashboard area to ensure a smooth base for the new installation.
Next, carefully measure and mark the location where you want to install the new receiver, making sure it aligns with your vehicle’s design. Using a drill with the appropriate bit size, create pilot holes for the mounting screws, being mindful not to damage any internal components of the car. Attach the receiver using double-face tape or the included mounting kit. Connect all necessary wires, ensuring that signal and power connections are secure and compatible with your vehicle’s electrical system. For a professional car audio installation, double-check each step for accuracy and safety, and consider consulting your vehicle’s owner manual if available.
Common Challenges and How to Overcome Them During Installation

During in-dash receiver installation, several common challenges can arise, especially for those attempting a DIY car audio installation in Toledo. One of the primary hurdles is ensuring proper compatibility between the new receiver and the vehicle’s existing electrical system. This requires thorough research to match the receiver’s pinout with the car’s wiring harness. Incorrect connections may lead to malfunctions or damage to components.
Another challenge is managing the spatial constraints within the dashboard. Professional car audio installation experts often encounter tight spaces, especially in older vehicles. Careful measurement and planning are essential to accommodate the receiver and other components while maintaining a clean, aesthetic look. Using slim-line equipment or modifying the dashboard can help overcome this issue, ensuring a seamless fit without compromising functionality.
Post-Installation Checks: Ensuring Optimal Performance

After successfully installing your new in-dash receiver, it’s crucial to perform a series of checks to ensure optimal performance and longevity of your car audio system. Start by testing all connections—the receiver should be securely fastened and all wires properly routed and connected. Double-check that the power and ground connections are tight and corrosion-free.
Next, fire up your vehicle and test the receiver’s functionality: verify that all inputs and outputs work as expected, including radio, aux, USB, and Bluetooth connectivity. Ensure audio is playing clearly through the speakers, with no static or distortion. Additionally, adjust volume levels and EQ settings to fine-tune sound quality according to your preferences. Remember, proper installation and initial checks are key to enjoying a high-quality car audio experience in Toledo, whether you’ve opted for a DIY car audio installation or a professional service.