Glass protectant applicator kits are essential for maintaining Toledo shower glass, offering a streak-free, shiny finish. By using specialized applicators and following instructions, DIY installation is achievable, protecting against water spots, stains, and simplifying cleaning. Gather supplies including protectant spray, microfiber cloths, and plastic sheeting; clean and dry the shower; apply protectant evenly, let it set, then buff with a cloth. This creates a hydrophobic barrier that repels water and dirt, ensuring your shower glass stays pristine.
“Discover the secret to streak-free, sparkling showers with our comprehensive guide on Shower Glass Protectant Application Toledo. We demystify the process, offering both professional and DIY techniques for effective shower glass protectant application. Learn how to choose the right kit, master various application methods, and maintain a gleaming bathroom. From time-saving tips to eco-friendly practices, this article equips you with the knowledge to make your shower glass protection routine a breeze.”
- Understanding Glass Protectant Applicator Kits: A Comprehensive Guide
- The Art of Shower Glass Protectant Application: Techniques and Tips
- DIY Glass Protectant Application: A Step-by-Step Process for Toledo Residents
- Benefits and Best Practices: Maximizing the Impact of Your Glass Protectant Routine
Understanding Glass Protectant Applicator Kits: A Comprehensive Guide

Glass Protectant Applicator Kits are essential tools for anyone looking to maintain and protect their shower glass surfaces. These kits provide a comprehensive solution for achieving a streak-free, lustrous finish on your shower walls and doors. The application process involves using specialized applicators that distribute the glass protectant evenly, ensuring thorough coverage without streaks or marks.
Understanding the correct application techniques is key to getting the best results. DIY glass protectant application can be accomplished with the right kit, which typically includes a selection of applicator pads or brushes designed for different surfaces and angles. By following the included instructions, you can effectively protect your shower glass, making it easier to clean and maintaining its clear, glossy appearance over time. This not only enhances the aesthetics of your bathroom but also prevents water spots and stains from forming on the glass.
The Art of Shower Glass Protectant Application: Techniques and Tips
DIY Glass Protectant Application: A Step-by-Step Process for Toledo Residents
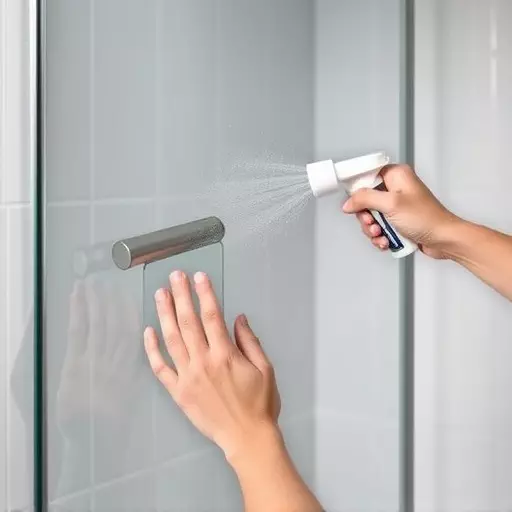
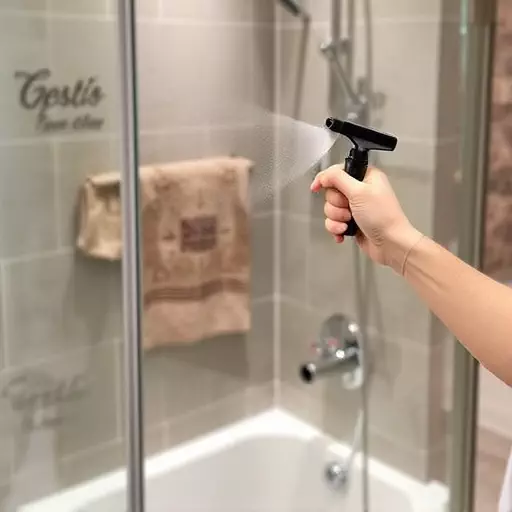
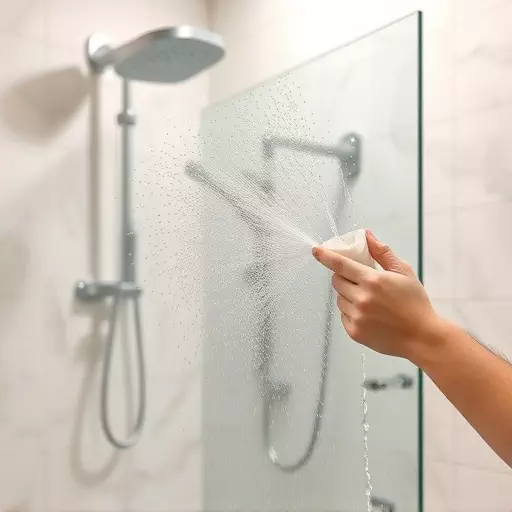
Applying a glass protectant at home can be a cost-effective and rewarding way to keep your shower glass looking sparkling clean. For Toledo residents, this process is straightforward with the right tools and techniques. Here’s a step-by-step guide for DIY glass protectant application:
Start by gathering your supplies, including a suitable glass protectant spray, microfiber cloths or towels, and plastic sheeting to protect surrounding areas. Ensure your shower is clean and dry before beginning. Put on protective gloves and mask for safety. Spray the glass protectant evenly over the entire surface of the shower glass, making sure to cover all corners and edges. Allow the product to set according to the manufacturer’s instructions. Once dry, use a microfiber cloth to buff the glass gently, removing any residue. This process creates a hydrophobic barrier that repels water and dirt, making cleaning easier and more efficient.
Benefits and Best Practices: Maximizing the Impact of Your Glass Protectant Routine
