High humidity in Toledo bathrooms causes fogged glass, water stains, and mineral buildup. Effective shower glass protectant application using high-quality products and proper DIY techniques prevents these issues, maintaining clear, streak-free showers for longer. Choosing the right protectant, applying it correctly, and regularly reapplying can extend the lifespan of shower installations, preserving bathroom aesthetics.
In high-humidity bathrooms, moisture can wreak havoc on your shower walls and glass, leading to unsightly stains and difficult-to-remove residue. This is where a shower glass protectant application becomes essential for Toledo residents. Understanding the challenges posed by humidity and choosing the right protective product can keep your shower looking like new. From DIY applications to advanced techniques, this guide explores various methods to achieve long-lasting protection while providing step-by-step instructions for an effective do-it-yourself solution.
- Understanding High-Humidity Bathrooms and Their Challenges
- The Importance of Shower Glass Protectant
- Choosing the Right Glass Protectant for Your Shower
- DIY Shower Glass Protectant Application: Step-by-Step Guide
- Advanced Techniques for Long-Lasting Protection
- Maintaining Your Shower's Protective Coating
Understanding High-Humidity Bathrooms and Their Challenges
High-humidity bathrooms present unique challenges for homeowners and professionals alike. With consistent moisture in the air, shower glass becomes prone to fogging, water stains, and mineral buildup, making it difficult to see through and compromising the aesthetic appeal of the space. This is where effective shower glass protectant application techniques come into play. By applying a high-quality glass protectant, you can significantly reduce these issues and maintain a clear, streak-free shower experience for an extended period.
In Toledo and beyond, understanding the importance of diy glass protectant application is crucial for those looking to tackle this problem themselves. The process involves choosing the right product, preparing the surface, and applying it evenly using specific techniques. By following these steps, homeowners can ensure their shower glass stays protected, prolonging the life of their installations and preserving the beauty of their bathrooms.
The Importance of Shower Glass Protectant
In high-humidity bathrooms, moisture can lead to fogged-up shower glass, making it difficult to see and compromising the overall experience. This is where a shower glass protectant application becomes indispensable. The right product not only clears up the glass but also creates a hydrophobic layer that repels water, preventing future fogginess. In Toledo or any other humid region, this simple step can transform your bathroom into a clear, inviting space.
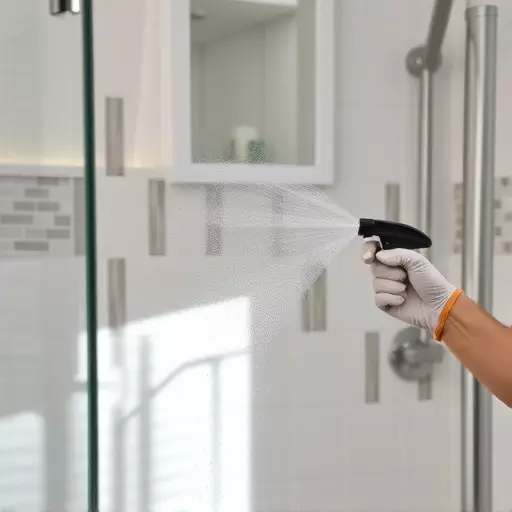
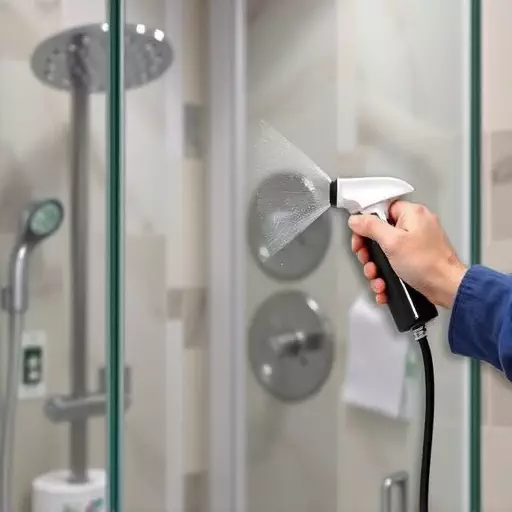
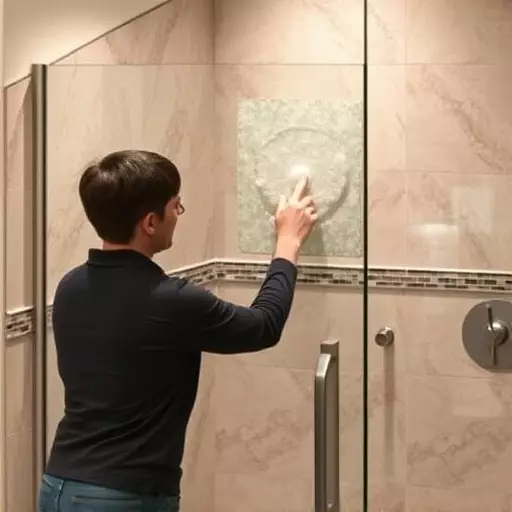
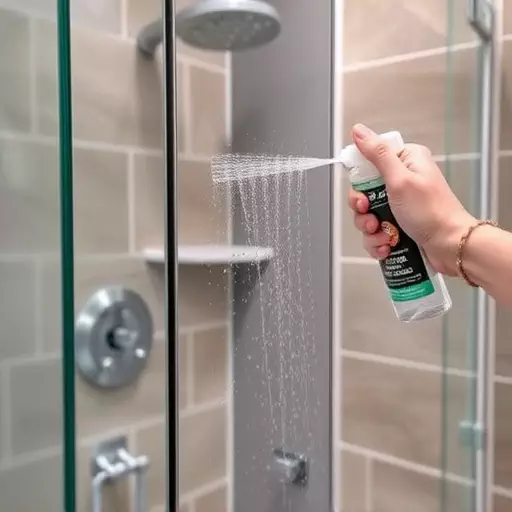
Choosing the right application technique is crucial for optimal results. DIY methods are accessible and cost-effective, using products designed specifically to tackle high-humidity challenges. These protective coatings can be applied with a soft cloth or sprayer, ensuring even coverage. Proper application involves cleaning the glass first to remove any residue, then applying the protectant in thin, even layers, following the product’s instructions for drying time. Regular reapplication, especially after cleaning, will maintain the protective barrier and keep your shower glass clear.
Choosing the Right Glass Protectant for Your Shower
When it comes to maintaining a pristine shower, selecting the ideal glass protectant is a crucial first step, especially in high-humidity environments. The right product will create a protective barrier on your shower glass, making cleaning easier and prolonging the overall lifespan of your glass surface. In Toledo, where humidity levels can be high, understanding how to apply a shower glass protectant is essential for any DIY enthusiast looking to keep their bathroom sparkling.
Choosing a glass protectant that suits your needs involves considering factors like water repellency, ease of application, and longevity. Many modern protectants come in the form of sprays or wipes, offering convenient DIY application techniques. These products often contain silicone or other hydrophobic agents that repel water and prevent soap scum from forming. Applying these protectants regularly—ideally before showering—will ensure your glass stays clear and streak-free, making cleaning a breeze.
DIY Shower Glass Protectant Application: Step-by-Step Guide

Creating a clear, streak-free shower experience is easier than you think! This DIY shower glass protectant application guide will transform your high-humidity bathroom. Start by gathering a few simple ingredients: a high-quality glass protectant spray, a soft microfiber cloth, and perhaps a silicone applicator for precise control.
Follow these steps: first, thoroughly clean the shower glass to remove any soap residue or mineral deposits. Then, evenly mist the protectant onto the glass surface, ensuring complete coverage. Next, using your microfiber cloth, wipe the protectant in a back-and-forth motion until it forms a clear, glossy finish. Wait for it to dry completely before enjoying your now water-repellent shower! This simple process will prevent water spots and make cleaning a breeze.
Advanced Techniques for Long-Lasting Protection

Maintaining Your Shower's Protective Coating
