This text provides a comprehensive guide to installing pedestal sinks, focusing on two main types: undermount and drop-in. It emphasizes the importance of choosing the right type based on personal style, and details proper installation techniques for both styles to prevent leaks and ensure long-lasting performance. The guide includes essential tool and material lists, step-by-step instructions for preparation and installation, and troubleshooting tips for common challenges faced by DIY enthusiasts. Regular maintenance is highlighted to extend the lifespan of installations, with a strong emphasis on Sink Installation and Repair Toledo services for expert guidance and support.
Looking to install a pedestal sink? This comprehensive guide covers everything from choosing between an undermount or drop-in sink to final touches and maintenance. Whether you’re a DIY enthusiast or calling in professionals for Sink Installation and Repair Toledo, understanding the process is key. We break down the tools, materials, step-by-step instructions, common challenges, and expert tips for a seamless upgrade. Master these steps, and your new sink will be the centerpiece of any bathroom.
- Understanding Sink Types: Undermount vs Drop-In
- Preparation: Tools and Materials Needed for Installation
- Step-by-Step Guide to Pedestal Sink Installation
- Common Challenges During Installation and Troubleshooting Tips
- Final Touches and Maintenance for Your New Sink
Understanding Sink Types: Undermount vs Drop-In

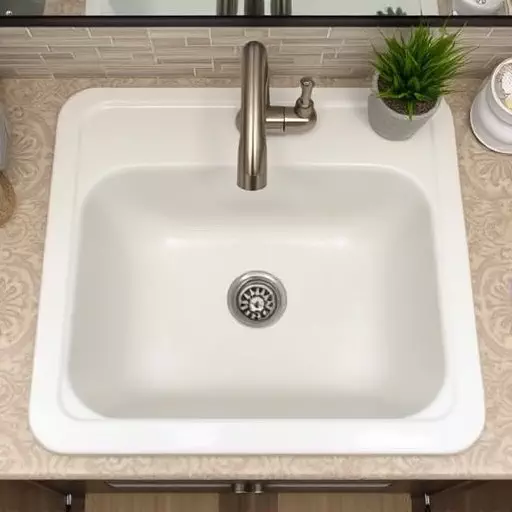
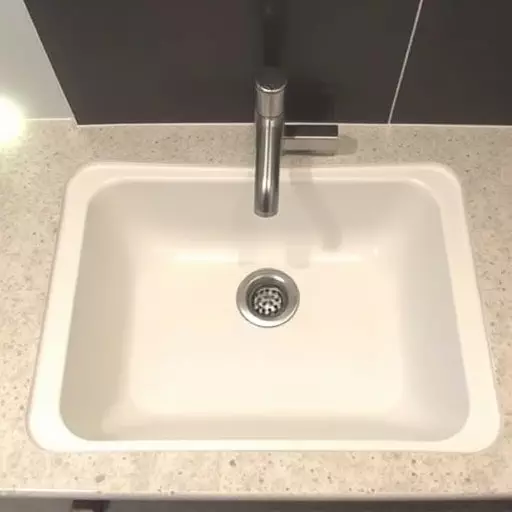
When it comes to pedestal sink installation, understanding the two primary sink types—undermount and drop-in—is essential for a successful and aesthetically pleasing outcome. Undermount sinks are installed below counter surfaces, creating a seamless look with clean lines. This style requires precise measuring and cutting of the countertop to accommodate the sink, making it ideal for those seeking a modern, sleek design. On the other hand, drop-in sinks rest on top of the counter, offering easier installation and access for repairs in Toledo or any location. They provide a more traditional appearance and are versatile, suitable for various countertop materials.
Whether opting for an undermount or drop-in sink, proper installation is crucial to ensure water drainage, leak prevention, and long-lasting performance. For expert guidance and service, consider seeking professional help for sink installation and repair, ensuring your new pedestal sink becomes a central focal point in any bathroom space.
Preparation: Tools and Materials Needed for Installation

Before tackling any sink installation—whether it’s an undermount or drop-in model—gather your tools and materials. For a successful sink installation and repair in Toledo or elsewhere, you’ll need basic tools like wrenches, pliers, and screwdrivers, along with supplies such as silicone caulk, grout, and sealing compound. Ensure proper fit by measuring the sink’s dimensions against the counter opening and checking for any necessary cuts to the countertop.
Proper preparation includes turning off the water supply to avoid leaks during installation. Protect your work area with drop cloths and put on safety gear, including gloves and eye protection. With the right tools and materials ready, you’re well-equipped to handle either undermount sink installation or drop-in sink installation, ensuring a neat and functional finish for your space.
Step-by-Step Guide to Pedestal Sink Installation
Installing a pedestal sink can transform your bathroom, offering both aesthetic appeal and functionality. Here’s a step-by-step guide to help with either a new installation or repair in Sink Installation and Repair Toledo.
1. Remove the Old Sink (if applicable): If you’re replacing an old sink, start by turning off the water supply valves located under the sink. Then, carefully remove any hardware, such as faucets and drain assemblies, using appropriate tools. Next, stabilize the old sink with a wrench or pliers and gently pull it out of the pedestal or cabinet.
2. Prepare the Pedestal: Inspect your pedestal for any signs of damage or wear. Ensure it’s clean and dry before proceeding. Position your new sink onto the pedestal, aligning the holes for the faucet and drain with the corresponding marks on the pedestal. Secure the sink in place using bolts or screws, tightening them firmly but without overtightening to avoid damage.
3. Undermount or Drop-In Installation: Depending on your chosen setup, either attach the sink to the underside of the countertop (undermount) or set it into a hole cut into the countertop (drop-in). For undermount sinks, use silicone caulk to seal the gap between the sink and countertop. For drop-in sinks, ensure proper fits and secure with adhesive or screws as needed.
4. Connect Water Lines: Turn on your water supply valves and attach the new faucet to the corresponding pipes. Tighten connections securely but gently. Connect the drain assembly, ensuring all parts are properly aligned and sealed.
5. Final Touches: Install any additional hardware, such as a garbage disposal unit if applicable. Test the sink’s functionality by turning on the water and checking for leaks at all connections.
Common Challenges During Installation and Troubleshooting Tips

During sink installation, several common challenges often arise, especially for DIY enthusiasts. One of the primary issues is ensuring accurate measurements and fitting the sink seamlessly into the designated space, whether it’s an undermount or drop-in style. Misalignment can lead to water leaks and an unappealing finish. Another challenge involves connecting the plumbing properly; incorrect installations can result in flooding or water damage.
Troubleshooting these problems requires a systematic approach. Double-check all measurements before purchasing your sink, and consider seeking professional advice for complex plumbing setups. For undermount sinks, ensure the hole sizes match the faucet holes to avoid complications. In case of leaks, check joints and seals thoroughly. If a drop-in sink is involved, verify that the edges fit tightly against the counter, preventing water from seeping in. Regular maintenance and prompt attention to any issues will help extend the lifespan of your sink installation, ensuring a smooth and efficient repair or installation process in Toledo or beyond.
Final Touches and Maintenance for Your New Sink

Once your new pedestal sink is in place, it’s time to add the final touches and ensure proper maintenance. Start by securing any loose fixtures and ensuring all connections are tight. A simple trick is to run warm water through the faucet for a few minutes to check for leaks—any dripping indicates that adjustments might be needed.
Regular upkeep is crucial for your sink’s longevity, especially in the case of undermount or drop-in sinks. Avoid using abrasive cleaners that can scratch the surface; instead, opt for mild, pH-neutral detergents. Periodically check for any signs of damage or wear and promptly address them to prevent further complications. Regular cleaning and maintenance will keep your sink looking pristine and ensure it functions optimally, enhancing your overall experience with Sink Installation and Repair Toledo services.