Embarking on a DIY toilet installation in Toledo requires a suite of essential tools such as a wrench set, water supply hose, shut-off valve, basin wrench, saw or cutting tool, utility knife, sturdy gloves, tape measure, and safety glasses for safe and successful completion. The process involves precise steps including shutting off the water supply, draining the old toilet, removing it, laying a fresh wax ring, aligning and securing the new toilet, connecting the water supply lines, ensuring the toilet is level to prevent leaks, and testing its functionality, including the flapper's smooth operation and flush power. Throughout, adherence to Toledo's building codes and manufacturer guidelines is crucial for a reliable and efficient toilet installation using the appropriate toilet installation tools, ensuring homeowners can confidently complete their project with a well-functioning bathroom addition.
navigating a toilet installation in Toledo demands attention to detail and safety. This comprehensive guide equips homeowners with the necessary tools and knowledge for a secure and efficient process. From essential hardware to intricate components, we’ll explore the steps to a successful installation, ensuring your bathroom remains functional and safe. Whether you’re tackling the task yourself or consulting a professional, this article serves as a vital resource for DIY toilet installation in Toledo, complete with pro tips and a thorough post-installation checklist.
- Essential Tools for Safe Toilet Installation in Toledo
- Step-by-Step Guide to the Toilet Installation Process
- Flange Positioning and Water Supply Connections for Optimal Safety
- Understanding the Components of a Toilet Unit for Hassle-Free Installation
- Pro Tips for DIY Toilet Installation: Ensuring Precision and Safety in Toledo Homes
- Post-Installation Checklist: Ensuring Your New Toilet Functions Safely and Efficiently
Essential Tools for Safe Toilet Installation in Toledo


When embarking on a DIY toilet installation in Toledo, having the right tools is paramount to ensure safety and efficacy throughout the process. The essential tools for toilet installation include a quality wrench set, which will be necessary for securing bolts and tightening fittings without causing damage to the porcelain. A water supply hose, shut-off valve, and a basin wrench are also crucial for connecting the water supply and reaching tight spaces under the toilet. Additionally, a level bubble tool is important to guarantee the toilet is installed at the correct height for both functionality and comfort. A toilet installation in Toledo should also involve a saw or cutting tool to handle the removal of old flooring if necessary, and a utility knife for cutting through wax rings during installation or removal. A pair of sturdy gloves will protect your hands from sharp edges and chemical exposure, while a tape measure ensures accurate measurements for positioning. A pair of safety glasses is recommended for any project involving tools to safeguard your eyes from debris.

Before initiating the toilet installation process, it’s necessary to shut off the water supply to prevent leaks. Once the old toilet is removed and the area is cleared, you can proceed with installing the new wax ring and setting the new base into place. Aligning the bolts correctly and securing them to the floor is a critical step that will affect the stability of the installation. After connecting the water supply and ensuring everything is functioning properly, a final check with the level bubble tool confirms the toilet is installed at the correct slope for optimal drainage. With all connections tightened and the toilet seated securely, you can complete the process by caulking around the base to prevent leaks and water damage over time. Remember to adhere to local plumbing codes and consider consulting a professional if you’re unsure about any aspect of the DIY toilet installation in Toledo.
Step-by-Step Guide to the Toilet Installation Process

When embarking on a DIY toilet installation in Toledo using the necessary tools and following a structured process, it’s crucial to approach the task methodically. Begin by shutting off the water supply to the old toilet and flush the tank to drain the remaining water from the system. Next, remove the water supply lines, the tank, and then the bowl from the floor waste. Use a screwdriver and a wrench for these tasks, as they are key tools in your arsenal for this project.
With the old toilet removed, prepare the area for the new one by cleaning up any debris and ensuring the flange is clean and at the correct height. Place a new wax ring on the floor over the waste pipe opening, centered appropriately. Carefully set the new toilet bowl onto the wax ring, press down firmly to create a good seal. Then, attach the tank to the bowl, connect the water supply lines, and secure them with the appropriate fittings. Make sure all connections are tight but not overly torqued to avoid cracking. After reconnecting the water supply and allowing the tank to fill, check for leaks at the base and under the tank. If everything is leak-free, your DIY toilet installation process is complete, and you can now enjoy the fruits of your labor with a newly installed, functioning toilet. Remember throughout this process to consult your local building codes and plumbing regulations in Toledo as necessary to ensure compliance and safety.
Flange Positioning and Water Supply Connections for Optimal Safety

When undertaking a DIY toilet installation in your home using tools available in places like Toledo, accurate flange positioning is paramount for optimal safety and functionality. The flange, which anchors the toilet to the sewage line, should be at the correct height and level to prevent leaks and ensure a secure fit. It’s crucial to remove the old wax ring and any existing seal before placing the new flange at the finished floor height, as per the manufacturer’s guidelines. Use a level to confirm that the flange is horizontal; this will facilitate proper drainage and avoid water damage over time.
For the water supply connections, it’s essential to follow the toilet installation process carefully, ensuring compliance with local building codes for water conservation and safety. Begin by shutting off the water supply to the toilet, then disconnect the old water lines before capping them off. When installing new supply lines, opt for flexible connectors that can minimize strain on joints and reduce the likelihood of leaks. Always use the appropriate tools for cutting pipes, such as a tube cutter, and ensure that all connections are tight but not overly constrained to avoid cracking the toilet tank or bowl. With careful attention to detail at each step of the process, your DIY toilet installation will yield a safe, efficient, and long-lasting fixture in your bathroom.
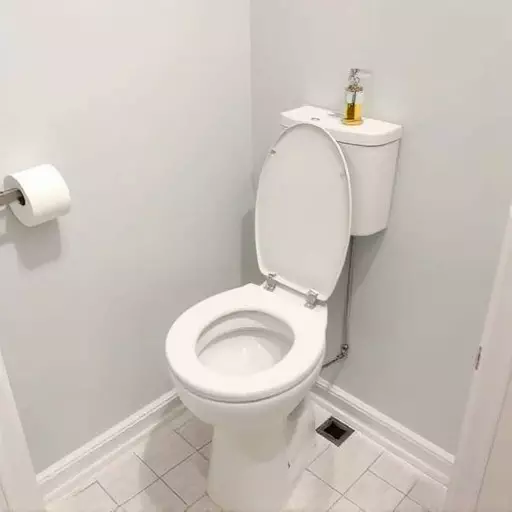
Understanding the Components of a Toilet Unit for Hassle-Free Installation

When embarking on a DIY toilet installation in Toledo, understanding the components of a toilet unit is paramount for a hassle-free process. A toilet comprises several key parts: the tank, bowl, flapper, fill valve, overflow tube, bolts, wax ring, and shut-off valve. Begin by gathering the necessary tools for toilet installation, which typically include a wrench set, a screwdriver, a hacksaw, a level, a rubber mallet, a utility knife, and plumber’s tape. These tools will aid in disconnecting the old toilet, preparing the area for the new one, and securing it in place.
The installation process starts with shutting off the water supply to the toilet via the shut-off valve, if present. If not, the main water line will suffice. Proceed by removing the old wax ring and flush the toilet to drain any remaining water. Use a pry bar to carefully remove the old toilet, taking note of its position relative to the floor drain for alignment purposes. Place the new wax ring on the closet flange and set the base of the new toilet in place, gently rocking it to form a seal with the wax ring. Secure the toilet to the floor with the provided bolts, ensuring a level installation for proper function. Connect the water supply line to the tank, attach the tank to the bowl, and position the flapper and fill valve. Finish by bleeding any air from the system and turning the water supply back on to test the toilet for leaks. With the correct tools and a clear understanding of each component’s role, you can perform a successful Toledo toilet installation following the toilet installation process, ensuring both functionality and safety in your home.
Pro Tips for DIY Toilet Installation: Ensuring Precision and Safety in Toledo Homes

When undertaking a DIY toilet installation in Toledo homes, precision and safety are paramount to ensure the longevity and functionality of the new fixture. The right set of toilet installation tools is crucial for tackling this project effectively. Homeowners should prepare a rubber mallet, plumber’s tape, a level, a screwdriver, a wrench set, a hacksaw, a measuring tape, and a utility knife. These tools are essential for tasks ranging from cutting through old wax to aligning the toilet perfectly flat on the floor for optimal performance.
Before beginning the installation process, it’s important to shut off the water supply and flush the toilet to drain any remaining water from the tank and bowl. Next, remove the old toilet by unscrewing the bolts that hold it in place and carefully set it aside. With the area cleared, you can proceed with installing the new wax ring around the base of the new toilet, creating a watertight seal between the toilet and the floor. Position the toilet over the sewage line and waste outlet, aligning it with the bolts protruding from the flange on the floor. As you lower the toilet into place, use the rubber mallet to gently tap it onto the wax ring, ensuring that it sits level and securely. Once in position, connect the water supply lines and tighten the bolts to anchor the toilet to the floor. Use the level to confirm that the toilet is perfectly horizontal; this will prevent any leaks or future issues. Throughout the installation process, adherence to local building codes and manufacturer instructions is essential. By following these steps and utilizing the appropriate toilet installation tools, Toledo residents can complete their project with confidence, ensuring a safe and efficient bathroom addition to their homes.
Post-Installation Checklist: Ensuring Your New Toilet Functions Safely and Efficiently

When your new toilet is installed, it’s crucial to perform a comprehensive checklist to ensure its functionality and safety. The toilet installation process in Toledo, Ohio, requires precision and attention to detail. To begin with, verify that all connections are secure, including the water supply lines and the waste outlet. Utilize the toilet installation tools effectively; a level is essential for ensuring the toilet sits properly on the flange, while a sturdy trowel will aid in smoothing out the bedding around the base. Adjust the nuts on the bolts beneath the base of the toilet to achieve a watertight seal and proper stability.
Next, check the alignment of the toilet by rocking it gently front-to-back and side-to-side; it should wobble minimally. Ensure that the wax ring or flange seal is intact and free of leaks, as this will prevent water from escaping into the subfloor. Flush the toilet to confirm that it fills, dispenses, and refills correctly without any signs of leaking at the base or within the cistern. Listen for proper flapper operation within the tank; the flapper should close quickly after the flush is completed to prevent water waste. Finally, test the flush power by observing how well the toilet clears its basin; it should be effective without being excessive. After these checks, your DIY toilet installation is complete, and you can trust in the safety and efficiency of your new sanitary fixture.