Gravity-feed toilet systems offer an efficient DIY installation method using tools like Toledo. Homeowners can save costs by understanding system mechanics and gathering essential Toilet Installation Tools Toledo. The process involves removing old toilets, securing new ones, connecting water lines, installing a flush valve assembly, and testing for leaks. Common challenges include leveling and secure connections, addressed with the right tools and troubleshooting know-how. DIY enthusiasts can successfully install toilets independently using step-by-step guidance and Toilet Installation Tools Toledo.
Gravity-Feed Toilet Installation: A Comprehensive Guide for Do-It-Yourselfers. If you’re looking to replace your old toilet with a modern gravity-feed model, this step-by-step guide is for you. We’ll walk you through the essentials of gravity-feed toilet systems, the tools required (including Toledo-specific options), and a detailed DIY installation process. Learn how to navigate common challenges and troubleshoot issues for a successful, cost-effective upgrade.
- Understanding the Gravity-Feed Toilet System
- Gathering the Essential Toilet Installation Tools Toledo
- The DIY Toilet Installation Process Step-by-Step
- Common Challenges and Troubleshooting Tips for Successful Installation
Understanding the Gravity-Feed Toilet System

Gravity-feed toilet systems are a common and efficient method for toilet installations, making DIY toilet installation a feasible task for home improvement enthusiasts. This system operates based on a simple yet effective principle: water flows from a higher position to a lower one due to gravity. The key component is the water supply line, which delivers water to the tank and then communicates with the bowl through a set of vents and channels.

During the toilet installation process using Toledo tools, it’s crucial to ensure proper alignment and sealing to maintain this flow. Sealing around the base of the toilet and connecting pipes ensures that water remains in its designated path. The DIY toilet installation process involves carefully placing the toilet, attaching the supply lines, and adjusting for any necessary leveling. Understanding how gravity-feed systems work empowers homeowners to tackle this task with confidence, potentially saving costs on professional installations.
Gathering the Essential Toilet Installation Tools Toledo

When embarking on a DIY toilet installation project in Toledo, ensuring you have the right tools is paramount to a successful outcome. The basic toolkit for any Toilet Installation Process includes a few essential items that will facilitate the task. Start with a robust set of wrenches, including adjustable and pipe wrenches, to securely fasten components. A plier set is also crucial, especially needle-nose pliers for delicate tasks like gripping small parts or unclogging pipes.
Don’t overlook safety gear; protective eyewear and gloves are essential to shield you from debris and potential hazards. Additionally, a measurement tape and level will help ensure the toilet is aligned correctly. For plumbing connections, gathering couplings, seals, and a suitable solvent cement kit is vital. These tools collectively empower you to navigate the Toilet Installation Process with confidence, ensuring your new toilet is securely in place and functioning optimally.
The DIY Toilet Installation Process Step-by-Step

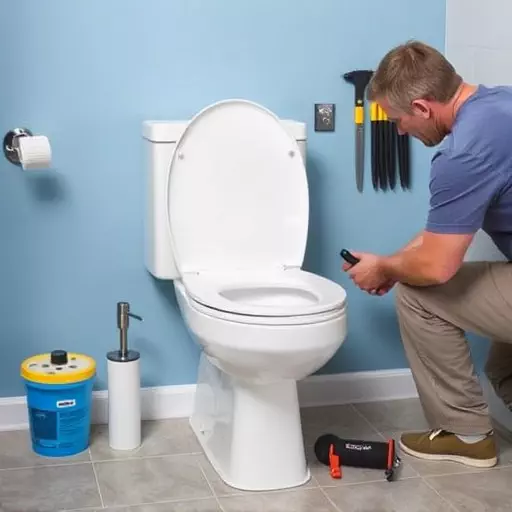
Installing a gravity-feed toilet yourself can be a rewarding DIY project, and with the right tools and a systematic approach, it’s easier than you think. Here’s a breakdown of the toilet installation process:
1. Prepare for Installation: Start by gathering all necessary Toilet Installation Tools Toledo, including a new toilet, removal tools (like a wrench or pliers), and replacement parts like a flush valve assembly or flapper. Turn off the water supply to your toilet by closing the shut-off valves under the sink or in the basement. Then, remove the old toilet by loosening the bolts holding it down using your tools, lifting it out carefully, and disconnecting the water lines.
2. Install the New Toilet: Position the new toilet on the floor, ensuring it’s level. Secure it to the floor with bolts provided or use a suitable adhesive designed for this purpose. Connect the water lines, making sure they are tightly sealed to prevent leaks. Install the flush valve assembly according to the manufacturer’s instructions, and attach the chain to the flapper. Once everything is in place, test the toilet’s functionality, ensuring it flushes correctly and no water leaks from any joints or connections.
Common Challenges and Troubleshooting Tips for Successful Installation

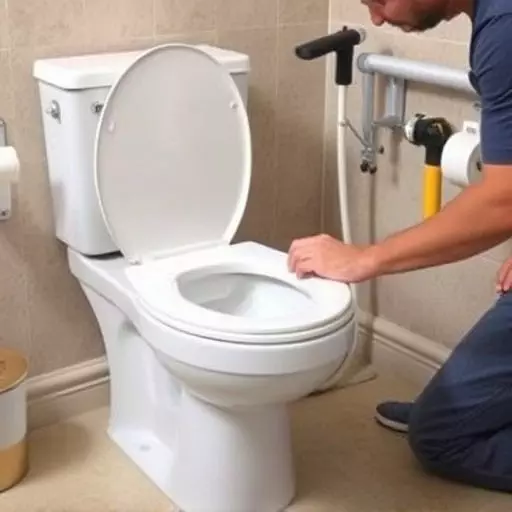
During the DIY toilet installation process, several common challenges can arise, but with the right tools and some troubleshooting know-how, they can be easily overcome. One of the primary hurdles is ensuring a level and secure flush. This often requires precise adjustments to the tank lever and flapper chain, which can be finicky. Another challenge involves connecting the water supply lines without leaks, needing specific tools like PEX crimpers or adjustable wrenches for a neat and secure fit.
Troubleshooting tips include checking all connections for any loose parts and tightening as needed. Regular toilet installation tools Toledo, such as pliers and measuring tapes, should be readily available to handle various tasks. If the toilet won’t flush properly, inspect the flapper for damage or wear and replace it if necessary. For water leaks, double-check seals and connections, ensuring no gaps or kinks in supply lines. A DIY approach offers cost savings but demands patience and attention to detail throughout the toilet installation process.