Before installing a subwoofer in your Toledo vehicle, understand your car's electrical system, including power sources and grounding mechanisms specific to your make and model. Identify the correct fuse for your subwoofer, use proper grounding techniques, and consider DIY or professional installation based on your comfort level and complexity of wiring. Match your subwoofer with a compatible amplifier for optimal performance. Fit the subwoofer perfectly in its designated space by taking precise measurements and cutting box material accordingly. Build your own subwoofer enclosure for a rewarding DIY project or opt for professional services for expert guidance. Prioritize safety during installation, power down electrical components, use high-quality cables, and double-check connections. After installation, calibrate and test the subwoofer for optimal sound performance, focusing on frequency response and volume levels. Maintain and optimize your car audio setup by cleaning speakers regularly, using high-quality wiring, and securely fastening the subwoofer to prevent damage or distortion.
“Are you ready to transform your car’s audio experience? Dive into the world of car subwoofer installation and discover how to enhance your vehicle’s sound system. This comprehensive guide covers everything from understanding your car’s electrical system to calibrating your new setup. Learn about choosing the right components, building a custom subwoofer enclosure, wiring with safety in mind, and optimizing your audio. Whether you’re a DIY enthusiast or considering a professional install, these steps will ensure a powerful and tailored sound for your Toledo ride.”
- Understanding Your Car's Electrical System for Subwoofer Installation
- Choosing the Right Subwoofer and Amplifier for Your Vehicle
- Measuring and Cutting Your Subwoofer Box to Perfect Fit
- Building and Fitting the Subwoofer Enclosure: A Step-by-Step Guide
- Wiring and Connecting Your Subwoofer: Safety First
- Calibrating and Testing Your Installed Subwoofer System
- Tips for Maintaining and Optimizing Your Car Audio Setup
Understanding Your Car's Electrical System for Subwoofer Installation

Before installing a subwoofer in your vehicle, it’s crucial to have a basic understanding of your car’s electrical system. The first step is familiarizing yourself with the power source and grounding mechanisms unique to your make and model. Many modern cars have integrated audio systems with dedicated fuses and wiring harness, which you’ll need to trace for safe and efficient subwoofer integration. This process involves identifying the appropriate fuse for your subwoofer and ensuring proper grounding techniques are employed to avoid any short circuits or electrical malfunctions.

For those considering a DIY car subwoofer installation in Toledo, understanding these fundamentals is essential. It allows for safer modifications and ensures optimal performance from your new audio system. Conversely, professional subwoofer installation services provide expertise and peace of mind, especially when dealing with complex wiring configurations or integrating advanced subwoofer setups.
Choosing the Right Subwoofer and Amplifier for Your Vehicle

Choosing the right subwoofer and amplifier is a crucial step in any car audio system setup, especially for those looking to achieve that immersive bass experience. When it comes to DIY subwoofer installation or considering professional services in Toledo, several factors must be taken into account. First, match your chosen subwoofer with an amplifier that can deliver the required power. The right amp ensures optimal performance and prevents damage to your audio components.
For a bustling car audio landscape, select a subwoofer suitable for your vehicle’s size and interior. Different cars have varying spaces, so choosing a subwoofer that fits seamlessly without compromising on quality is essential. Professional installation services in Toledo can provide valuable guidance in selecting the perfect match, ensuring your car subwoofer installation is done right, enhancing your overall audio experience.
Measuring and Cutting Your Subwoofer Box to Perfect Fit

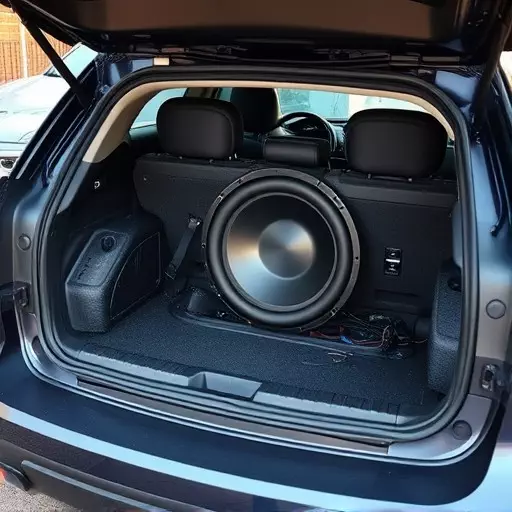
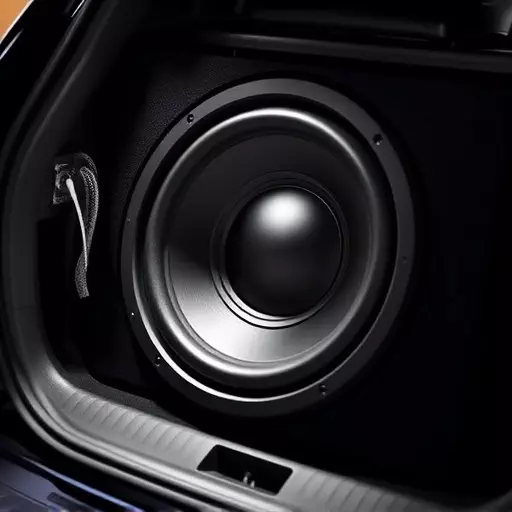
When installing a subwoofer in your vehicle, one of the most crucial steps is ensuring it fits perfectly within the designated space. Measuring and cutting your subwoofer box to the right dimensions guarantees optimal performance and minimizes vibrations that could cause damage or create unwanted noise. For a DIY car subwoofer installation in Toledo, start by taking precise measurements of the space where the subwoofer will be placed. Consider factors like the size of the subwoofer itself, any existing mounting brackets, and the proximity to other components or surfaces.
Using these measurements, cut the box material (such as plywood) to match, ensuring a snug fit without compromising structural integrity. Professional subwoofer installation often involves more intricate cutting and shaping to accommodate complex car interiors, but for a DIY project, accurate measurements and simple cuts will suffice. The goal is to create a box that securely holds your subwoofer while allowing it to vibrate freely for enhanced audio output during playback.
Building and Fitting the Subwoofer Enclosure: A Step-by-Step Guide

Building and fitting your own subwoofer enclosure is a rewarding DIY project that can significantly enhance your car audio experience. Start by gathering the necessary materials, including plywood sheets for construction, screws, a drill, measuring tape, and a saw. Design or choose a plan that suits your vehicle’s space constraints and desired subwoofer size. Cut the plywood pieces according to your measurements, ensuring precise fits for seamless assembly. Assemble the enclosure using wood glue and screws, focusing on sturdy joints for optimal sound quality.
Once assembled, test fit it into your car interior, adjusting as needed for a secure and tight-fitting placement. Drill mounting holes for the subwoofer, ensuring alignment with the enclosure’s speaker openings. Install the subwoofer securely within the enclosure, connecting it to your audio system using appropriate wiring. Final touches include sealing any gaps with caulk for added protection against moisture and vibrations. Whether you opt for a DIY approach or professional installation in Toledo, proper fitting ensures maximum performance from your car subwoofer.
Wiring and Connecting Your Subwoofer: Safety First

When wiring and connecting your subwoofer during a car subwoofer installation Toledo or diy subwoofer installation, safety should always be your top priority. Begin by ensuring all electrical components are turned off to avoid any accidental shocks or short circuits. Use high-quality cables and connectors to maintain optimal audio performance and prevent future issues. Properly identify positive and negative terminals, and double-check connections before powering on the system.
Consult a professional if you’re unsure about any aspect of the professional subwoofer installation process. Incorrect wiring can lead to damage not only to your subwoofer but also to other parts of your car’s audio system. Remember, taking precautions ensures both the longevity of your equipment and your peace of mind while enjoying that deep, rich bass.
Calibrating and Testing Your Installed Subwoofer System

After completing your subwoofer box installation, whether it’s a DIY project or done by a professional in Toledo, it’s crucial to calibrate and test your system properly. Calibration ensures that your subwoofer is reproducing sound at its optimal level, tailored to your vehicle’s acoustics. This process involves adjusting the subwoofer’s settings using specialized software to match the room’s resonances and create a balanced audio experience. Testing goes hand in hand with calibration; you’ll want to play various types of music or media to ensure the subwoofer delivers clear, powerful bass without distortion.
During testing, pay attention to the subwoofer’s response across different frequencies and volumes. Ensure it seamlessly blends with the main speakers, creating a harmonious soundscape. This step is vital for achieving the best possible audio performance, ensuring that your car subwoofer installation in Toledo not only looks clean and professional but also sounds exceptional.
Tips for Maintaining and Optimizing Your Car Audio Setup

Maintaining and optimizing your car audio setup after a subwoofer box installation is crucial for enjoying the best sound quality. Regularly clean or replace your car’s speakers and subwoofer to prevent dust buildup, which can degrade performance. Use high-quality speaker wire and connectors during installation to avoid signal loss and ensure optimal sound transmission. Additionally, properly secure your subwoofer within the vehicle to minimize vibrations that could cause damage or distort the audio output.
For a DIY subwoofer installation in Toledo, remember to choose a location with minimal interference from metal components or other electronic devices. This can help reduce electrical noise and improve signal clarity. If you opt for a professional subwoofer installation, select a reputable shop that understands the intricacies of car audio systems. They can fine-tune your setup using specialized equipment, ensuring that frequencies are balanced and your subwoofer is optimized for maximum output within your vehicle’s acoustic environment.