DIY toilet setup hinges on proper flange (or wax ring) installation using specific tools like wrenches and pliers for water-tightness. Preparation includes floor leveling, gathering Toilet Installation Tools Toledo, and checking plumbing readiness to avoid leaks and future headaches. This guide emphasizes correct tools, measurement, tightening, and following the Toilet Installation Process for successful DIY toilet installations in Toledo.
Looking to install a new toilet yourself? This comprehensive guide covers everything you need to know about the Toilet Installation Process, focusing on Flange Installation. From Understanding Toilet Flange Installation and gathering the right Toilet Installation Tools in Toledo to Preparing Your Bathroom and performing each step correctly, we break down the DIY Toilet Installation process. Learn how to avoid common mistakes and perform final checks to ensure a smooth, successful setup.
- Understanding Toilet Flange Installation: A Comprehensive Overview
- Gathering the Right Toilet Installation Tools in Toledo
- Preparing Your Bathroom for a DIY Toilet Installation
- Step-by-Step Guide to Flange Installation
- Common Mistakes to Avoid During Toilet Setup
- Final Checks and Maintenance Tips for New Toilet Installation
Understanding Toilet Flange Installation: A Comprehensive Overview


Toilet flange installation is a crucial step in the overall toilet installation process, and it’s a task that many DIY enthusiasts can tackle with the right tools and knowledge. Understanding the flange, its function, and the installation process is key to ensuring a secure and level toilet fitting. The toilet flange, also known as a base or wax ring, creates a water-tight seal between the toilet bowl and the floor, preventing leaks and ensuring a stable connection.

The DIY toilet installation process involves preparing the bathroom floor, removing the old toilet (if applicable), measuring and marking the flange’s position, and then attaching it to the drain pipe using specific tools like a wrench or pliers. Once installed, the new flange supports the weight of the toilet bowl, allowing for easy replacement in the future. This comprehensive overview will guide you through each step, ensuring a successful toilet installation using the correct Toilet Installation Tools Toledo.
Gathering the Right Toilet Installation Tools in Toledo

When it comes to toilet installation in Toledo, having the right tools is paramount for a smooth and successful DIY process. The average toilet installation requires a variety of tools, including wrenches (both open-end and adjustable), pliers, a level, a measuring tape, and a new toilet with all necessary parts. Ensure you have these essentials on hand to streamline your toilet installation project.
A well-prepared toolbox with Toilet Installation Tools Toledo will make navigating the process much easier. With the right tools in place, you can confidently tackle the task of removing the old toilet, preparing the floor, and installing the new unit accurately and efficiently. This knowledge empowers homeowners to complete their bathroom renovations independently, saving time and money on hiring professionals for simple installations.
Preparing Your Bathroom for a DIY Toilet Installation

Before you begin your DIY toilet installation, preparing your bathroom is a crucial step in the process. Gather all the necessary toilet installation tools Toledo; this might include wrenches, pliers, and a new toilet. Clear the bathroom floor of any obstructions to ensure easy access during the toilet installation process. Remove any old fixtures or debris that might interfere with the new toilet’s placement. Double-check that your plumbing is in good condition and ready to accommodate the new toilet.
Proper preparation saves time, effort, and potential headaches later. Ensure your bathroom floor is level to facilitate a secure DIY toilet installation. Consider adding shims if there are any gaps or unevenness. This step is vital for a stable and long-lasting toilet setup. With everything in place, you’re ready to begin the exciting process of installing your new toilet!
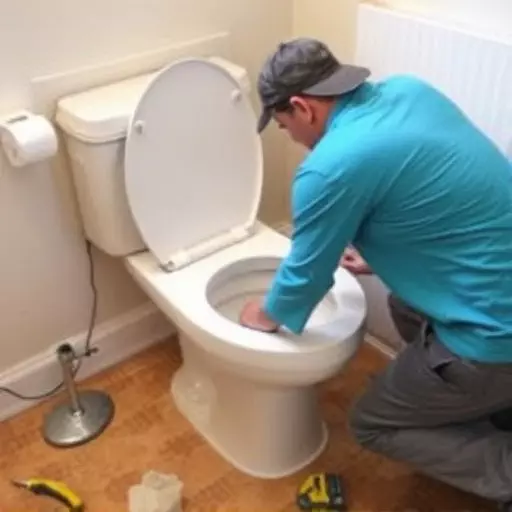
Step-by-Step Guide to Flange Installation

Installing a flange is a crucial step in the toilet installation process, especially for DIY enthusiasts. Here’s a straightforward guide to ensure a smooth and secure fit:
1. Gather Your Toilet Installation Tools Toledo: Before beginning, make sure you have all necessary tools ready, including a wrench or pliers, a level, and a measuring tape. These tools are essential for securing the flange correctly and ensuring a watertight seal.
2. Prepare the Floor and Remove Old Flange: Clear the area around the toilet’s mounting hole of any debris. If there’s an old flange in place, carefully remove it using the appropriate tools. Clean the floor to eliminate any residue or dirt, as this will ensure better adhesion for the new flange.
Common Mistakes to Avoid During Toilet Setup

When setting up a toilet, especially through DIY toilet installation, there are several common mistakes to avoid that can complicate the process or lead to leaks and other issues. One of the most frequent errors is not using the appropriate Toilet Installation Tools Toledo. Ensure you have all the necessary tools before beginning; this includes wrenches, pliers, and any specialized hardware specific to your model. Improperly measuring and cutting the flush pipe is another common pitfall; always double-check measurements to guarantee a snug fit without leaks.
Another mistake to steer clear of is not tightening connections sufficiently. Every component, from the flange to the supply lines, must be secured tightly to maintain water pressure and prevent leaks. Additionally, ignoring the manufacturer’s instructions for leveling the toilet can lead to uneven installation and potential damage over time. Following the Toilet Installation Process step-by-step, with attention to detail, will ensure a solid, leak-free setup for your DIY project.
Final Checks and Maintenance Tips for New Toilet Installation

After successfully installing your new toilet, it’s crucial to conduct final checks and implement maintenance tips for a seamless experience. Begin by verifying the water supply lines are tightly connected and secure, ensuring no leaks occur. Check that the toilet flushes properly, with water clearing from the bowl after each use. Examine the flange for any gaps or misalignments; it should fit snugly against the floor, creating an airtight seal.
Regular maintenance is key to prolonging your toilet’s lifespan. Keep a close eye on the flush mechanism and trim the chain if needed. Clean the bowl regularly with non-abrasive cleaners to prevent mineral buildup. Additionally, inspect the toilet’s base for any signs of damage or moisture, addressing issues promptly to avoid potential problems down the line. DIY toilet installation can be accomplished with the right tools (like those found in a Toilet Installation Tools Toledo kit) and some basic knowledge of the Toilet Installation Process. Regular upkeep will ensure your new toilet remains in top condition.