This text provides a comprehensive guide for successfully installing a toilet DIY-style using specific tools known as Toilet Installation Tools Toledo. It emphasizes pre-installation planning, including assessing space and gathering necessary tools like wrenches, pliers, caulk, and measuring tape. The process covers removing the old toilet, preparing new components, securing connections, and ensuring proper levelation with levels. Challenges such as tight spaces and stubborn bolts are addressed using specialized tools. Post-installation, it stresses maintenance tips for longevity, including regular cleaning and leak prevention. SEO keywords: Toilet Installation Tools Toledo, Toilet Installation Process, DIY Toilet Installation.
Looking to install a new toilet yourself? This comprehensive guide is your perfect companion. From understanding essential Toilet Installation Tools Toledo to navigating the Toilet Installation Process, we’ve got you covered. Learn how to assess your space, gather the right supplies, and follow a step-by-step approach for a successful DIY Toilet Installation. Discover tips for troubleshooting common issues and maintaining your new toilet to ensure longevity.
- Understanding Toilet Installation Tools Toledo
- Assessing Your Space and Planning the Toilet Installation Process
- Gathering Essential DIY Toilet Installation Supplies
- Step-by-Step Guide to a Successful DIY Toilet Installation
- Troubleshooting Common Issues During DIY Toilet Installation
- Tips for Maintaining Your Newly Installed Toilet
Understanding Toilet Installation Tools Toledo

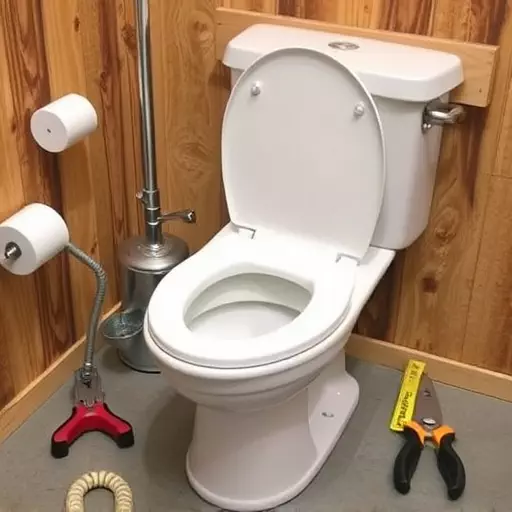
Toilet Installation Tools Toledo play a crucial role in the DIY toilet installation process. Before beginning, ensure you have all the necessary tools to make the job easier and more efficient. Basic tools like wrenches, pliers, and screwdrivers are essential for disassembling the old toilet and installing the new one. For a smooth experience, consider investing in specialized tools designed specifically for toilet installations, such as a toilet lift or a funnel-shaped tool for easy water filling.

Understanding how these tools fit into the Toilet Installation Process is key. Tools like a level help ensure your new toilet is properly aligned, while measuring tapes and markers assist in precise cuts and markings during the removal of old components. With the right Toilet Installation Tools Toledo at hand, you’ll be better equipped to handle any challenges that may arise during the DIY installation process, ensuring a secure and efficient outcome.
Assessing Your Space and Planning the Toilet Installation Process

Before you start your DIY toilet installation, it’s crucial to assess your space and plan the process meticulously. Start by measuring the existing toilet area to ensure the new toilet fits comfortably without disrupting other fixtures or structures. Consider the water supply lines and electrical outlets in the bathroom; you’ll need these for your new toilet. Gather all the necessary Toilet Installation Tools Toledo, including a new toilet, bolts, wax rings, and any additional parts specific to your model.
Plan out each step of the DIY toilet installation process. This includes removing the old toilet, preparing the floor, installing the new toilet’s hardware, and ensuring proper sealing with a wax ring. It’s important to have all your tools and materials ready before beginning to avoid delays or complications during the installation. A well-planned approach will make the Toilet Installation Process smoother and more successful.
Gathering Essential DIY Toilet Installation Supplies

When embarking on a DIY toilet installation, having the right supplies is crucial for a smooth and successful process. Gather essential tools like a wrench or pliers, which are vital for securing connections. Additionally, you’ll need sealing compounds, such as caulk, to ensure water doesn’t seep through gaps, along with various types of adhesives suitable for bathroom installations. Don’t forget measuring tape to accurately determine space requirements and fit the new toilet perfectly; this is a critical step in any toilet installation process.
Also, consider acquiring a level to ensure the toilet is straight and true, avoiding any messy mistakes. With these toilet installation tools at hand, you’ll be well-prepared to tackle the job confidently, enabling a seamless transition to your newly installed toilet.
Step-by-Step Guide to a Successful DIY Toilet Installation

A successful DIY toilet installation requires careful planning and the right tools (Toilet Installation Tools Toledo). Begin by gathering all necessary materials and ensuring your new toilet is compatible with your existing plumbing. Next, turn off the water supply to prevent leaks during the installation process. With safety goggles and gloves on, remove the old toilet carefully, taking note of how it was secured to the floor. Clean the area thoroughly before measuring and marking the placement of the new toilet. Using a drill, create pilot holes for the bolts that will secure the toilet in place. Attach the toilet’s hardware to the bowl, then lower the bowl into position, aligning it with the marks you made earlier. Once level, fasten the bowl securely using the anchored bolts. Finally, connect the water supply and ensure all connections are tight before flushing the toilet for the first time. Following this DIY Toilet Installation Process will help you complete your project smoothly and efficiently.
Troubleshooting Common Issues During DIY Toilet Installation

When tackling a DIY toilet installation, it’s not uncommon to encounter challenges along the way. Familiarizing yourself with common issues and their solutions can save time and frustration. One frequent problem is improper levelation, which can lead to water leakage or an uneven flush. Ensure your new toilet is level by using a bubble level during installation. If you’re experiencing plumbing issues, double-check connections and tighten any loose pipes to prevent blockages or leaks.
Another potential hurdle is fitting the toilet into the existing space, especially in smaller bathrooms. Measuring dimensions carefully before purchasing a toilet is crucial. Consider using Toilet Installation Tools Toledo to ensure a snug yet secure fit. If you encounter stubborn bolts or tight spaces, adjustable wrenches and specialized tools designed for toilet installations can prove invaluable. Remember, a smooth DIY toilet installation process requires patience, the right tools, and attention to detail.
Tips for Maintaining Your Newly Installed Toilet

After successfully completing your DIY toilet installation using the right Toilet Installation Tools Toledo, proper maintenance is key to ensure a long-lasting, efficient, and comfortable bathroom experience. Regular cleaning and simple preventive measures can go a long way in keeping your new toilet in top condition. Start by familiarizing yourself with the various parts of the toilet and understand how each component functions during the Toilet Installation Process. This knowledge will enable you to address any potential issues promptly.
Schedule regular deep cleans using mild, non-abrasive cleaning agents. Pay special attention to the bowl, rim, and seat areas where dirt and bacteria can accumulate. Additionally, ensure that you unclog the drain regularly to maintain proper water flow. Keep an eye out for any leaks, whether from the base, tank, or joints, and address them immediately using sealing products recommended for DIY toilet installations.