Installing a dual-flush toilet is manageable with the right tools, such as the Toilet Installation Tools Toledo, which include specialized components for a seamless process. After preparing your space and gathering necessary tools, remove the old toilet, measure the area, and attach the new model. Reconnect water lines securely, perform electrical wiring safely, and make final adjustments for a fully functional, water-efficient dual-flush toilet.
Thinking of upgrading your bathroom with a dual-flush toilet? This comprehensive guide walks you through the entire DIY toilet installation process, from gathering the essential Toilet Installation Tools Toledo to final adjustments and testing. We’ll break down each step, including removing the old toilet, preparing for the new one, connecting water lines and electrical wiring, and more. By following these expert tips, you can save time and money while ensuring a smooth DIY Toilet Installation.
- Understanding the Toilet Installation Tools Toledo
- Preparing for the Toilet Installation Process
- Removing the Old Toilet: A Step-by-Step Guide
- Installing the New Dual-Flush Toilet
- Connecting Water Lines and Electrical Wiring
- Final Adjustments and Testing
- DIY Toilet Installation: Tips and Common Mistakes to Avoid
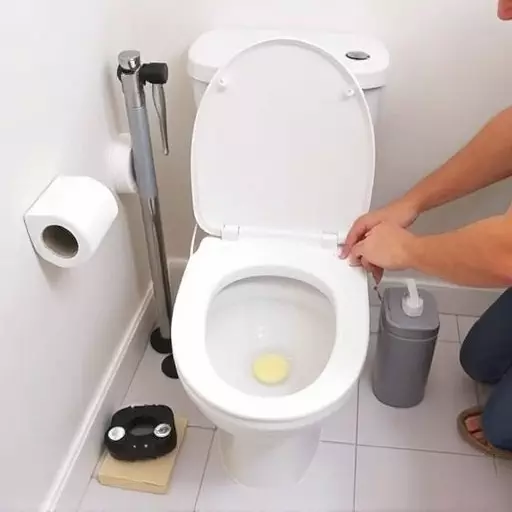
Understanding the Toilet Installation Tools Toledo

Installing a dual-flush toilet is a relatively straightforward process, but it does require the right tools to ensure a seamless fit and efficient operation. The Toilet Installation Tools Toledo are designed to simplify this task for both professional plumbers and DIY enthusiasts. These tools cater to the specific needs of dual-flush toilets, which have unique components compared to standard models.

The installation process involves several steps, including preparing the old toilet for removal, fitting the new dual-flush mechanism, and adjusting water connections. The Toledo tools offer a comprehensive set of items such as an adjustable wrench, pliers, and specialized adapters, enabling users to manage various tasks with ease. With these tools at hand, DIY enthusiasts can confidently navigate the Toilet Installation Process, ensuring their new dual-flush toilet is not only functional but also contributes to water conservation efforts.
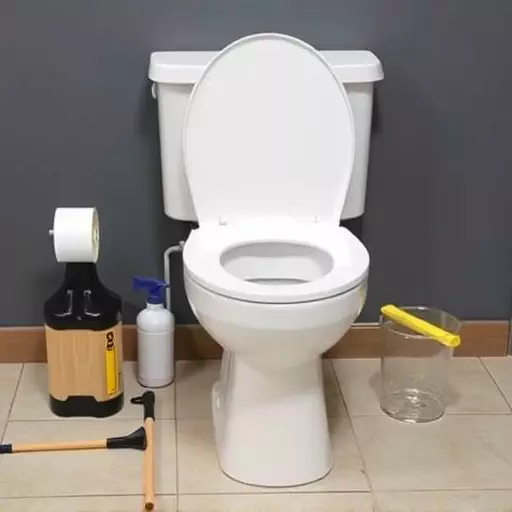
Preparing for the Toilet Installation Process

Before starting the installation process, gathering the right toilet installation tools is essential for a successful DIY toilet installation. You’ll need a variety of tools including a level, wrenches (both open-end and pipe), pliers, a measuring tape, and possibly an adjustable blade knife. Ensure your space is prepared by clearing any obstructions and checking that the floor can support the weight of the new toilet. Measuring the existing toilet area and verifying the fit of the new dual-flush model is crucial to avoid any last-minute surprises or complications during the installation.
Once ready, begin by removing the old toilet, taking note of how it was connected to the plumbing. This involves detaching the water supply lines and carefully cutting away any remaining components. With the space prepared and the old toilet removed, you can now focus on installing your new dual-flush toilet, step-by-step, using the tools and equipment you’ve gathered.
Removing the Old Toilet: A Step-by-Step Guide

Removing an old toilet is often a crucial step in any toilet installation process, especially for DIY enthusiasts tackling the job themselves. The first step involves gathering the necessary tools, including a wrench or pliers, to loosen and remove the existing toilet from its base. It’s important to have a good grip on these tools as the process requires some physical effort. Start by lifting the toilet lid and identifying the bolts that secure it to the floor. Using your chosen tool, carefully loosen and remove these bolts one at a time, being mindful of any water or waste still present in the tank.
Once the bolts are freed, gently wiggle the toilet back and forth to break its seal and detach it from the floor. You may need to apply some force, but be cautious to avoid damaging the bathroom tiles or flooring. After the toilet is free, carefully lift it out of place, clearing any debris or remaining attachments. This step requires careful handling as heavy toilets can be cumbersome. With the old toilet removed, you’re one step closer to installing your new dual-flush model using proper Toilet Installation Tools Toledo and following a meticulous DIY Toilet Installation process.
Installing the New Dual-Flush Toilet

Installing a dual-flush toilet can be achieved with the right tools and some basic DIY skills. The first step in the toilet installation process is to remove the old toilet. This often involves detaching the supply lines and carefully lifting out the existing unit. Once the space is cleared, measure the dimensions to ensure the new dual-flush toilet fits perfectly.
With the correct Toilet Installation Tools Toledo at hand, prepare the new toilet for fitting. Follow the manufacturer’s instructions, which typically involve attaching the tank and bowl securely. The tankless design of dual-flush toilets simplifies this step in the DIY toilet installation process. Next, reconnect the water supply lines, ensuring a tight seal to prevent leaks. Test the flush mechanism, adjusting as needed until both settings operate smoothly and efficiently.
Connecting Water Lines and Electrical Wiring

During the toilet installation process, connecting water lines and electrical wiring is a crucial step in preparing your dual-flush toilet for use. If you’re tackling this DIY toilet installation, gather all necessary Toilet Installation Tools Toledo to ensure a smooth transition. Start by shutting off both the water supply valves located behind or beneath the toilet. Then, using pliers or similar tools, carefully disconnect the existing water lines from the old toilet and prepare them for connection to the new dual-flush model.
For electrical wiring, locate your circuit breaker and identify the dedicated circuit for the bathroom. Turn off the power at the breaker before accessing the wiring. From there, connect the grounding wire to the toilet’s ground terminal, ensuring proper bonding for safety. Then, run a new Romex cable with an appropriate gauge for your setup, connecting it to the power source and the dual-flush mechanism’s electrical requirements. Verify all connections are secure, reattach water lines, and test the functionality of both flush options before enjoying your newly installed dual-flush toilet.
Final Adjustments and Testing

Once the new dual-flush toilet is securely in place, it’s time for the final adjustments and testing. Begin by checking all connections to ensure everything is tight and secure, using the appropriate Toilet Installation Tools Toledo. Verify that the water supply lines are properly connected and that there are no leaks at any joints or fittings. Next, test the flush mechanism by activating both the full and half flush options. Make sure the toilet operates smoothly and efficiently, emptying completely each time. If adjustments are needed, this is the opportunity to fine-tune the flapper valve for optimal performance.
DIY Toilet Installation requires careful attention to detail during these final steps. Check that the toilet’s level is correct, with the seat flush against the floor and the tank aligned properly. Ensure the anchor bolts are tightened securely into the floor for stability. Finally, take a moment to appreciate your handiwork and prepare for the next phase of enjoying your upgraded bathroom facility.
DIY Toilet Installation: Tips and Common Mistakes to Avoid

Installing a dual-flush toilet can be a DIY project for those with some basic plumbing knowledge and the right tools. However, it’s essential to approach this process carefully to avoid common mistakes that can lead to leaks or poor performance. The first step is to gather all necessary Toilet Installation Tools Toledo, ensuring you have a new dual-flush toilet, an adjustable wrench, pliers, a screwdriver, and possibly a putty knife for sealing.
Before beginning the Toilet Installation Process, double-check your water supply valves and ensure they are turned off. Then, carefully remove the old toilet, being mindful of any pipes or wiring in the way. One frequent mistake is not securing the new toilet properly; use the provided hardware to attach it firmly to the floor, ensuring a level installation. Pay close attention to the flush mechanism and adjust it according to the manufacturer’s instructions for optimal dual-flush functionality.