
Vinyl siding is a popular choice for Appleton, Wisconsin homeowners due to its durability, low maintenance, and weather resistance. Before DIY installation, measure wall dimensions accurately, create a detailed plan, gather tools, and use siding apps for guidance. Key steps include preparing walls, installing starter strips, vertical panels, and trimming excess material. Avoid common mistakes like inaccurate measurements and inadequate surface prep. Regular cleaning and inspections ensure long-lasting vinyl siding protection and curb appeal. Use a siding installation app in Appleton, Wisconsin for tailored instructions.
“Considering a DIY siding installation for your Appleton, Wisconsin home? This comprehensive guide is your go-to resource. We explore the benefits of vinyl siding and why it’s a popular choice for local properties. From understanding materials to mastering the installation process, we break down each step. Learn essential tools needed, common mistakes to avoid, and tips for long-lasting results. Transform your home with our expert advice on DIY siding installation in Appleton, ensuring a sleek, durable exterior.”
- Understanding Vinyl Siding: Materials and Benefits for Your Appleton Wisconsin Home
- Planning Your DIY Siding Installation Project: Tools and Preparation Required
- Step-by-Step Guide to Installing Vinyl Siding on Your Property
- Common Mistakes to Avoid During the Siding Installation Process
- Maintenance and Longevity: Ensuring Your Vinyl Siding Stays in Top Condition
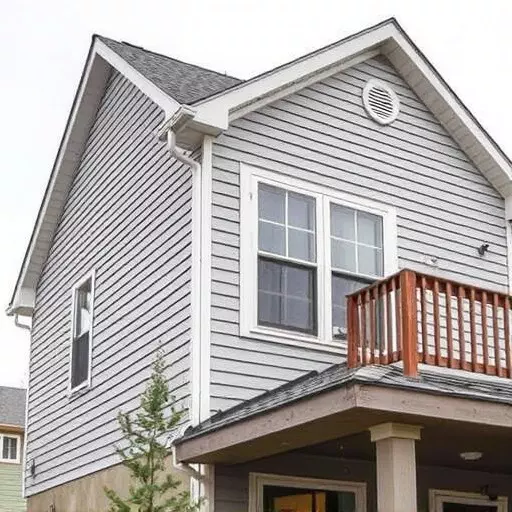
Understanding Vinyl Siding: Materials and Benefits for Your Appleton Wisconsin Home
Vinyl siding has become a popular choice for homeowners in Appleton, Wisconsin, and for good reason. This durable material offers an array of benefits that make it an attractive option for any DIY siding installation project. Made from polyvinyl chloride (PVC), vinyl siding is known for its resilience and low maintenance requirements. It can withstand extreme weather conditions, including high winds and heavy snowfall, without warping or damaging.
When considering siding installation in Appleton WI, vinyl siding provides long-lasting protection for your home’s exterior. Its smooth surface repels water and stains, ensuring your home stays looking clean and fresh. Additionally, vinyl siding is available in various styles, colors, and textures, allowing you to create a unique aesthetic that complements your property. This versatility makes it an excellent choice for those seeking both functionality and aesthetics in their siding installation project.
Planning Your DIY Siding Installation Project: Tools and Preparation Required
Before tackling your DIY siding installation project in Appleton, Wisconsin, careful planning and gathering the right tools are essential for success. Start by assessing your home’s exterior and determining the type of siding—like vinyl siding—that best suits your needs and style. Measure the length and height of your walls to calculate the total amount of material required, ensuring you account for cuts and corners. Create a detailed plan, including a layout of each section, to guide your installation process.
For a smooth DIY experience, prepare a toolkit with essential items such as a measuring tape, pencil, hammer, nails or screws specific to vinyl siding, utility knife, ladder, and protective gear. Additionally, consider using a siding installation appleton wisconsin resource for visual guides and step-by-step instructions tailored to your region’s climate and building practices.
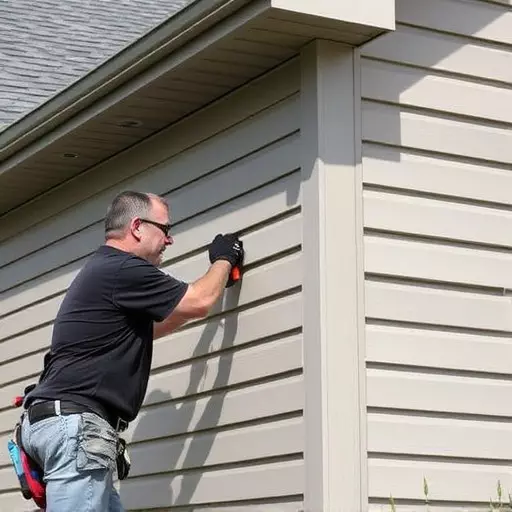
Step-by-Step Guide to Installing Vinyl Siding on Your Property
Installing vinyl siding on your property in Appleton, Wisconsin, can be a rewarding DIY project that enhances your home’s exterior appeal and adds value. Here’s a step-by-step guide to help you through the process:
1. Measure and Prepare: Start by measuring the length and height of your house to determine the total amount of vinyl siding needed. Remove any existing siding, trim, or debris from the walls. Clean the surfaces to ensure proper adhesion. Create a cut list based on your measurements for each type of siding piece you’ll be using.
2. Install the Bottom Row: Begin by installing the bottom row of siding, often called the starter strip. Use a level to ensure it’s straight and secure it with nails or screws as per manufacturer instructions. This serves as a base for the rest of the siding panels.
3. Lock in Panels: Starting from the bottom, work your way up installing vertical siding panels. Align each panel with the one below it and lock them together using mechanical fasteners or tape, depending on the vinyl siding type. Make sure there are no gaps between panels. Use a hammer and nails to secure the panels at regular intervals for added strength.
4. Trim and Finish: Once all panels are installed, trim any excess material around doorframes, windows, and corners. Ensure proper sealing around these openings to maintain the integrity of your siding installation. Check for any loose panels or connections and tighten as needed.
Common Mistakes to Avoid During the Siding Installation Process
When tackling DIY siding installation in Appleton, Wisconsin, it’s crucial to be aware of common pitfalls that can arise during the process. One of the biggest mistakes homeowners make is not properly measuring their home’s exterior before purchasing materials. This leads to incorrect quantities and unnecessary waste. Always take accurate measurements using a tape measure or laser gauge, and double-check your orders accordingly.
Another frequent error is not preparing the surface adequately. Before installing vinyl siding—a popular choice for its durability and low maintenance—make sure the wall is clean, dry, and free from any debris. Failure to do so can result in poor adhesion, leading to gaps or bubbles in the finished product. Inspect your surface carefully and address any issues, such as peeling paint or loose debris, before beginning installation.
Maintenance and Longevity: Ensuring Your Vinyl Siding Stays in Top Condition
Proper maintenance is key to ensuring your vinyl siding in Appleton, Wisconsin, remains in top condition for years to come. Regular cleaning will help prevent dirt and algae buildup, maintaining the siding’s aesthetic appeal. Use a soft-bristled brush and mild detergent to gently scrub any soiled areas, then rinse thoroughly with a garden hose. Avoid using harsh chemicals or power washers, as these can damage the siding.
Additionally, inspect your vinyl siding regularly for signs of wear, cracking, or warping. Promptly address any issues to prevent further damage. Keeping an eye on the overall condition of your siding will contribute to its longevity, ensuring it continues to protect your home from the elements and maintain its attractive finish, enhancing the curb appeal of your property in the process.