This text offers insights into compact car amplifier installation in both DIY and professional settings in Toledo. It emphasizes the importance of choosing the right amplifier for your vehicle based on make, model, sound quality, and budget. The guide covers essential tools and preparation steps, safety precautions like battery disconnection, and detailed installation processes for both options. Key considerations include proper grounding, heat ventilation, and fine-tuning settings for optimal sound quality after installation. SEO keywords are woven throughout.
“Looking to boost your car audio experience? Discover the art of compact amplifier installation with our comprehensive guide. From understanding the basics to optimizing sound quality, we’ve got you covered. Learn about choosing the perfect amplifier for your vehicle and whether DIY or professional installation is right for you. Navigate through preparation tips, step-by-step instructions, common mistakes to avoid, and expert insights. Elevate your in-car entertainment with our practical advice tailored for a seamless car amplifier installation Toledo residents trust.”
- Understanding Compact Amplifier Installation Basics
- Choosing the Right Amplifier for Your Vehicle
- Preparation and Tools Required
- Step-by-Step DIY Amplifier Installation Guide
- Professional Installation vs. Do-It-Yourself
- Common Mistakes to Avoid During Installation
- Optimizing Sound Quality Post-Installation
Understanding Compact Amplifier Installation Basics

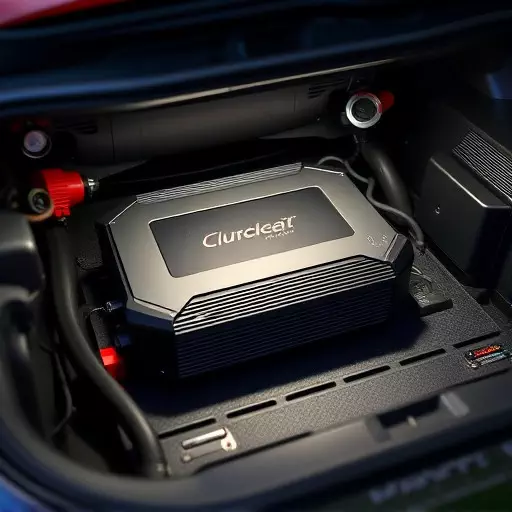
When it comes to compact amplifier installation, whether in a car or as a DIY project, understanding the basics is key. For car enthusiasts in Toledo, Ohio, looking to enhance their audio experience, professional amplifier installation offers unparalleled results. It involves carefully planning and strategically placing the amplifier within the vehicle’s electrical system to ensure optimal sound quality and performance.

For the do-it-yourself installer, knowing the essential components of a compact amplifier setup is crucial. This includes understanding how to wire the amplifier correctly, selecting appropriate gauge wires for power and signal, and ensuring proper grounding. A professional installation service, on the other hand, leverages specialized tools and expertise to navigate the vehicle’s complex electrical network, providing a seamless and secure fit for even the most intricate amplifier setups.
Choosing the Right Amplifier for Your Vehicle

Choosing the right amplifier for your vehicle is a crucial step in any car audio upgrade. It’s essential to consider factors like your car’s make and model, desired sound quality, and budget. A professional installer or expert can guide you through this process, ensuring compatibility and optimal performance. They have the knowledge to select the ideal amplifier size and power rating for your specific vehicle, whether it’s a DIY installation in Toledo or a professional setup.
When exploring options, look at brands offering high-quality components and reliable performance. Consider wattage output, input sensitivity, and signal-to-noise ratio to ensure your new amplifier integrates seamlessly with your existing audio system. Remember, the right amplifier will enhance your music listening experience, providing clear sound and powerful bass—all tailored to your vehicle’s unique needs.
Preparation and Tools Required

Before tackling a car amplifier installation in Toledo or any DIY amplifier installation, ensure you have all the necessary tools and materials ready. A typical setup includes a set of high-quality screwdrivers (both flathead and Phillips), wire strippers, a voltage tester, and perhaps even heat shrink tubing for added protection. For professional amplifier installation, specialized tools like crimping tools and soldering iron might be required to ensure the best connections.
Additionally, proper preparation involves double-checking your vehicle’s electrical system. Verify the location of essential components like the battery, fuse box, and power distribution center. Labeling these areas beforehand can make the car amplifier installation process smoother. Safety should also be a priority; disconnecting the car battery while working is an important step to prevent any accidental shocks or short circuits during your DIY amplifier installation.
Step-by-Step DIY Amplifier Installation Guide

DIY Amplifier Installation: A Step-by-Step Guide
If you’re a car audio enthusiast in Toledo looking to boost your sound system, installing a compact amplifier can be a rewarding DIY project. Before beginning, gather all necessary tools and components, ensuring compatibility with your vehicle. Start by locating an appropriate installation space, usually under the dashboard or in the trunk, considering factors like heat dissipation and wire routing. Next, carefully remove the existing stereo head unit, creating access to the amplifier mount.
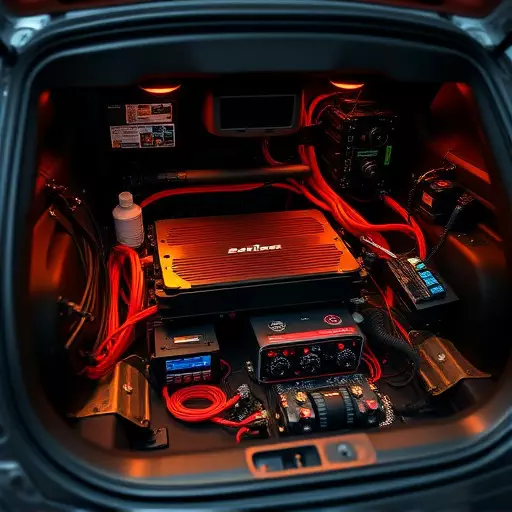
With proper clearance established, secure the new amplifier using brackets or mounts provided by the manufacturer. Ensure all connections are properly routed through gaps and openings, avoiding sharp edges. Connect the power and ground wires from the amplifier to your vehicle’s electrical system, following a safe and organized wiring path. Next, attach speaker wires to the amplifier’s output terminals, then connect them to your speakers. Always double-check connections for secure fits and consider using crimp connectors or terminal protectors for added reliability.
Professional Installation vs. Do-It-Yourself

When it comes to installing a car amplifier in Toledo, deciding between professional installation and a DIY approach is an important choice. Many audio enthusiasts opt for professional services due to their expertise and attention to detail, ensuring a seamless fit and optimal sound performance. Professionals have the necessary tools and knowledge to navigate complex car interiors, providing a clean and secure installation. This option is ideal for those who value precision and want to avoid potential damage to their vehicle during the setup process.
On the other hand, DIY enthusiasts might be tempted to take on the task themselves, especially with the abundance of online tutorials available. While this can be a rewarding experience, it requires a good understanding of automotive systems and electrical wiring. Improper installation could lead to malfunctions or even damage to the amplifier or car components. For those confident in their skills and willing to invest time, a DIY approach offers cost savings and the satisfaction of completing a complex task independently.
Common Mistakes to Avoid During Installation

When installing a car amplifier in Toledo, whether it’s a DIY project or a professional service, there are some common mistakes to avoid. One of the most frequent errors is improper grounding, which can lead to electrical issues and potential damage to your vehicle’s system. Always ensure a solid and secure ground connection; this is crucial for safe and efficient amplifier operation.
Another mistake to steer clear of is underestimating the impact of heat on your amplifier. Compact amplifiers generate heat, so adequate ventilation is essential. Failing to provide sufficient airflow can cause overheating, leading to potential damage or even failure. Ensure proper placement and ventilation during installation, especially in enclosed spaces like car trunks or dashboards.
Optimizing Sound Quality Post-Installation

After successfully installing a compact amplifier in your vehicle or home audio system, optimizing sound quality is the next crucial step. The first thing to consider is diy amplifier installation versus professional amplifier installation. While DIY can save costs, proper placement and connection are essential for optimal performance. Ensure the amplifier is securely mounted to avoid vibrations that could cause damage or interference with the audio signal.
Additionally, the surrounding environment plays a significant role in sound quality. For car amplifier installation Toledo or home setups alike, aim for a space free from direct sunlight, extreme temperatures, and moisture. Proper ventilation helps maintain optimal operating temperature, ensuring consistent and high-quality sound output. Fine-tune the amplifier’s settings, including gain, bass, and treble, to achieve a balanced and rich audio experience that complements your system’s capabilities.