Glass protectants enhance bathroom aesthetics and durability in Lake Orion, Michigan, by repelling water stains and moisture. Effective DIY application involves choosing the right formula, using proper tools like microfiber cloths and spray bottles, and following a step-by-step guide for streak-free results. Avoiding common mistakes ensures long-lasting protection for shower glass surfaces.
“Elevate your shower experience with a professional-looking glass protectant finish in Lake Orion, Michigan. This comprehensive guide delves into the art of shower glass protectant application, providing both professionals and DIY enthusiasts with valuable insights. We explore the benefits and selection process for the perfect protectant, equip you with essential tools, and offer a step-by-step approach to achieve pristine results.
From understanding the product’s role to avoiding common mistakes, this article covers everything related to shower glass protectant application techniques, ensuring your bathroom shines like never before.”
- Understanding Glass Protectants: Their Role and Benefits
- Choosing the Right Protectant for Your Shower Glass
- Essential Tools for Efficient Application
- Step-by-Step Guide to Professional-Grade Application
- Common Mistakes to Avoid During DIY Glass Protectant Application
Understanding Glass Protectants: Their Role and Benefits
Glass protectants are specialized coatings designed to enhance the appearance and durability of glass surfaces, particularly in high-moisture environments like bathrooms. Their primary role is to prevent water stains, soap scum, and mineral deposits from forming on shower glasses, mirrors, and windows. By applying a glass protectant, you can achieve a glossy finish that repels dirt and moisture, making cleaning easier and more efficient.
The benefits of using a glass protectant extend beyond aesthetics. A high-quality protectant creates a barrier that reduces the need for frequent cleaning, saving time and effort. It also helps to maintain the clarity and transparency of the glass, ensuring that your shower or bathroom windows remain unobstructed and inviting. For DIY enthusiasts in Lake Orion, Michigan, applying a glass protectant can be an easy and cost-effective way to transform their bathroom’s ambiance while enjoying long-lasting results.
Choosing the Right Protectant for Your Shower Glass

When it comes to protecting your shower glass, selecting the ideal product is just the first step. Different shower glass protectants offer various benefits and are designed for specific needs. For instance, some are better at preventing water spots and streaks, while others enhance the glass’s natural glow or provide a scratch-resistant layer.
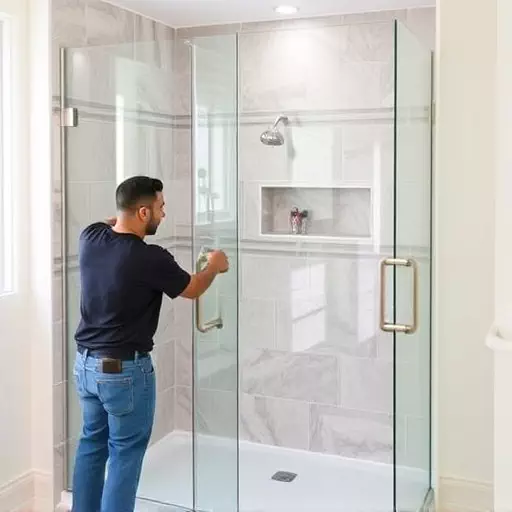
For DIY enthusiasts in Lake Orion, Michigan, there are numerous options available, from spray-on applications to gel formulas that require rubbing in. Understanding your preferences and the specific challenges of your shower environment will help you choose a protectant application technique that suits your needs.
Essential Tools for Efficient Application

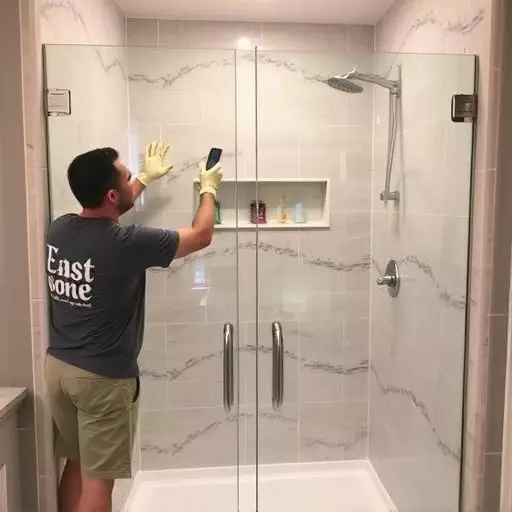
When it comes to applying a shower glass protectant effectively, having the right tools makes all the difference. For a DIY approach, start with a clean and dry surface. A microfibre cloth is an essential tool for spreading the protectant evenly, ensuring no streaks or gaps are left behind. These cloths are gentle yet effective in removing any residual particles and creating a smooth finish. Additionally, invest in a quality spray bottle to dispense the product consistently. This simple tool allows for precise control over the amount of protectant used, making it easier to cover every inch of your shower glass in Lake Orion, Michigan.
For efficient application, consider using a silicone blade or applicator. These tools are designed to work seamlessly with glass protectants, providing a professional-like finish without the need for extensive effort. A silicone blade can be particularly useful for reaching hard-to-reach corners and edges, ensuring complete protection. By combining these essential tools with the right glass protectant product, you’ll achieve a long-lasting, streak-free barrier that protects your shower from water spots and mineral deposits.
Step-by-Step Guide to Professional-Grade Application

Applying a professional-grade shower glass protectant can transform your bathroom into a sparkling oasis. Here’s a step-by-step guide tailored for those looking to achieve salon-style results in Lake Orion, Michigan, or anywhere else. First, gather your materials: a high-quality glass protectant suitable for showers, clean microfiber cloths, and a spray bottle filled with distilled water. Begin by cleaning the shower glass thoroughly with warm soapy water and a soft sponge. Rinse well and ensure no soap residue remains. Next, apply a thin, even layer of the glass protectant using one of the microfiber cloths. Spray the protectant onto the cloth rather than directly onto the glass to prevent overspray and ensure optimal coverage. Wipe the protectant in a back-and-forth motion, following the contours of the shower glass. Allow the protectant to dry for several minutes, then buff with a second microfiber cloth for a streak-free, glossy finish. This two-step process ensures maximum protection and water repellency for your shower glass.
Common Mistakes to Avoid During DIY Glass Protectant Application

When applying a glass protectant DIY-style, there are several common pitfalls to steer clear of. One major mistake is using an incorrect or poorly prepared surface; always ensure your shower glass is clean, dry, and free from any residue before beginning. Using outdated or subpar tools can also lead to streaking or uneven application—invest in high-quality microfibre cloths and applicators designed specifically for glass protectants.
Another frequent error is overlooking crucial steps like deionizing the water or using a suitable primer. These preparatory measures are essential to enhance adhesion and longevity of the protectant. Moreover, impatience during the drying process can result in smudges or spots; allow adequate time for each layer to set before moving on to the next, as per the product’s instructions.